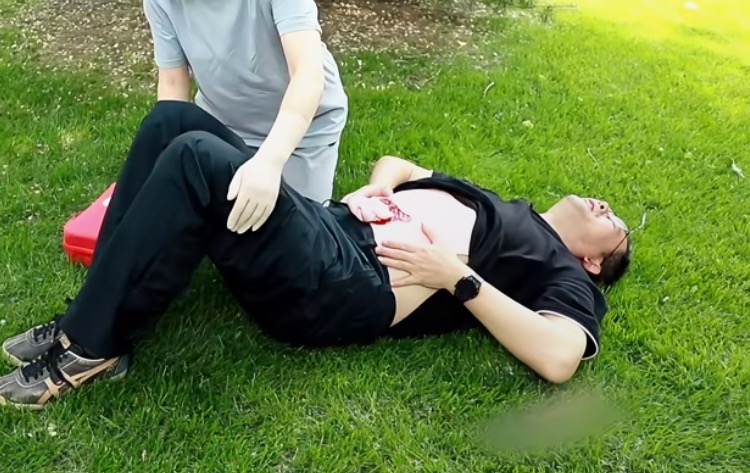
Learning how to make moulage wounds at home opens up a world of creative possibilities for Halloween costumes, theater productions, emergency response training, or just having fun with special effects. Moulage, the art of applying mock injuries for realistic simulation, might seem complex, but with the right techniques and materials, anyone can create convincing wounds using common household items. This comprehensive guide will walk you through everything you need to know about how to make moulage wounds at home, from basic cuts and bruises to advanced trauma effects that look incredibly real.
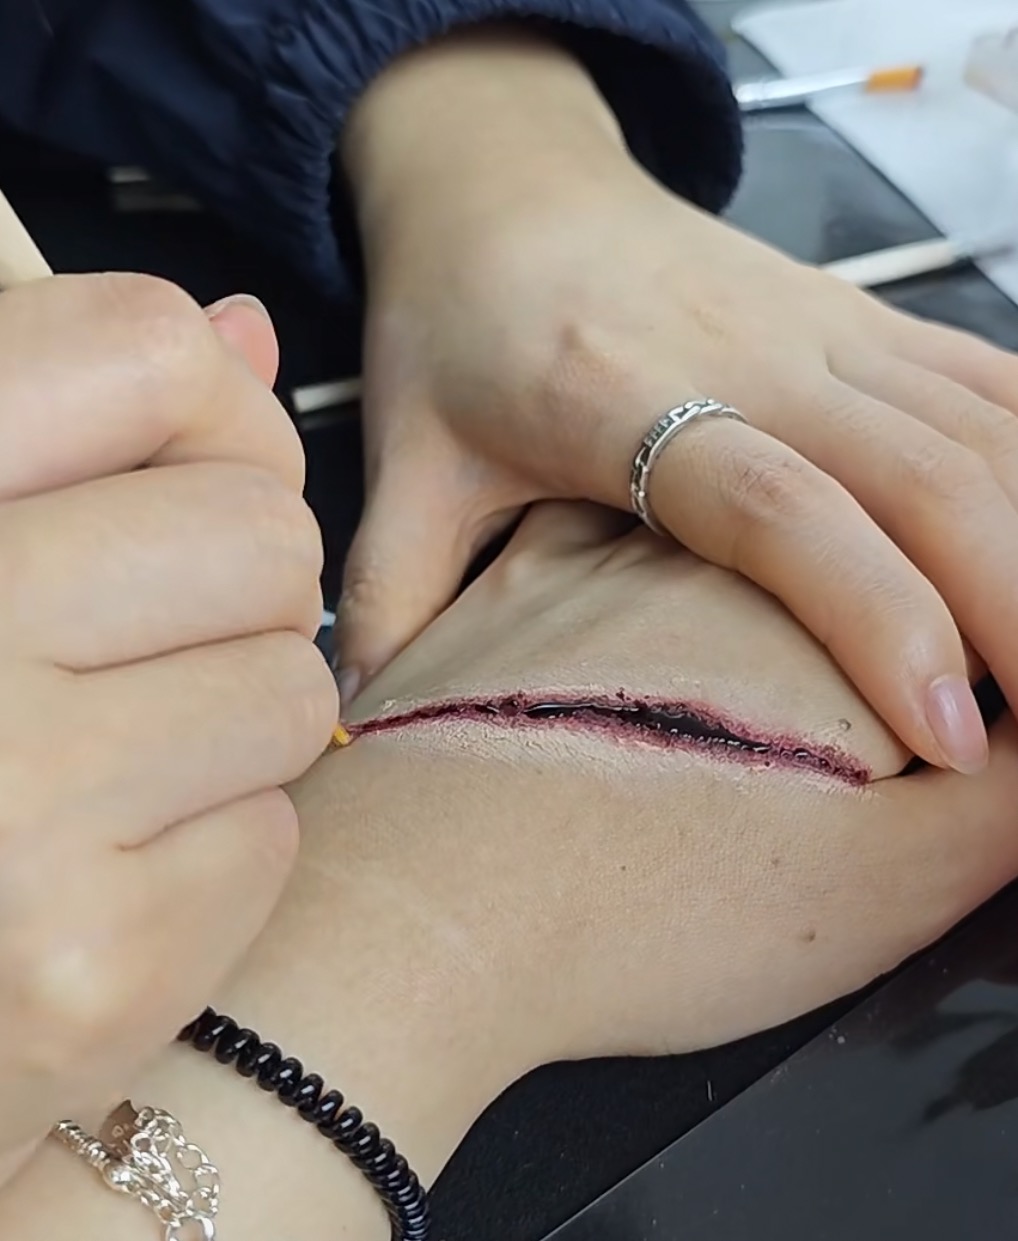
Table of Contents
What is Moulage and Why Learn It?
Moulage (French for “casting” or “molding”) is the art of creating simulated injuries for purposes ranging from entertainment to emergency training. While professional moulage artists use specialized materials, learning how to make moulage wounds at home allows you to create similar effects with accessible ingredients. The key to successful moulage lies in understanding how real injuries look and recreating those visual cues through texture, color, and dimension.
Applications of Moulage
- Theater and Film: Create realistic injuries for characters
- Halloween and Cosplay: Stand out with professional-looking effects
- Emergency Training: Help first responders practice treatment techniques
- Medical Education: Demonstrate various injury types and stages of healing
Understanding how to make moulage wounds at home not only saves money compared to buying pre-made prosthetics but also gives you complete creative control over the final look. With practice, you can create effects that rival professional work.
Essential Materials for Homemade Moulage
Before diving into specific techniques for how to make moulage wounds at home, it’s important to gather your materials. Many effective moulage supplies can be found in your kitchen or local craft store.
Basic Moulage Kit
- Foundation: Liquid latex, spirit gum, or petroleum jelly
- Coloring: Cream-based makeup, food coloring, or acrylic paints
- Texture: Tissue paper, cotton balls, gelatin, or flour
- Blood: Corn syrup-based fake blood or specialized blood capsules
- Application Tools: Makeup sponges, brushes, toothpicks, and cotton swabs
- Setting Materials: Baby powder or setting spray
When learning how to make moulage wounds at home, start with these basic materials before investing in specialized products. Many household items can be repurposed—for example, oatmeal can create texture for scabs, while coffee grounds mixed with Vaseline make excellent dirt or debris in wounds.
Safety First
Always perform a patch test with any new material on a small area of skin before applying it to larger areas. Some people may have allergic reactions to latex, certain adhesives, or makeup products. If you experience irritation, remove the product immediately and discontinue use.
Basic Moulage Techniques
Mastering fundamental techniques is crucial when learning how to make moulage wounds at home. These basic effects form the foundation for more complex injuries.
Simple Cuts and Abrasions
Step-by-Step Simple Cut
- Create the Base: Apply a thin layer of liquid latex to the skin where you want the cut. While still wet, press a small piece of tissue paper onto the latex.
- Build Dimension: Once dry, tear a small opening down the center of the tissue paper. Gently pull the edges apart to create a wound opening.
- Color the Wound: Use red and dark purple makeup to color the inside of the cut. Add touches of yellow around the edges for a fresh injury look.
- Add Blood: Apply fake blood inside the tear and allow it to drip slightly for a fresh wound effect.
- Blend Edges: Use foundation that matches the skin tone to blend the edges of the tissue paper into the surrounding skin.
This technique for how to make moulage wounds at home creates convincing cuts that can be customized for different sizes and depths. Practice varying the tear shape and blood amount to create anything from a small paper cut to a significant laceration.
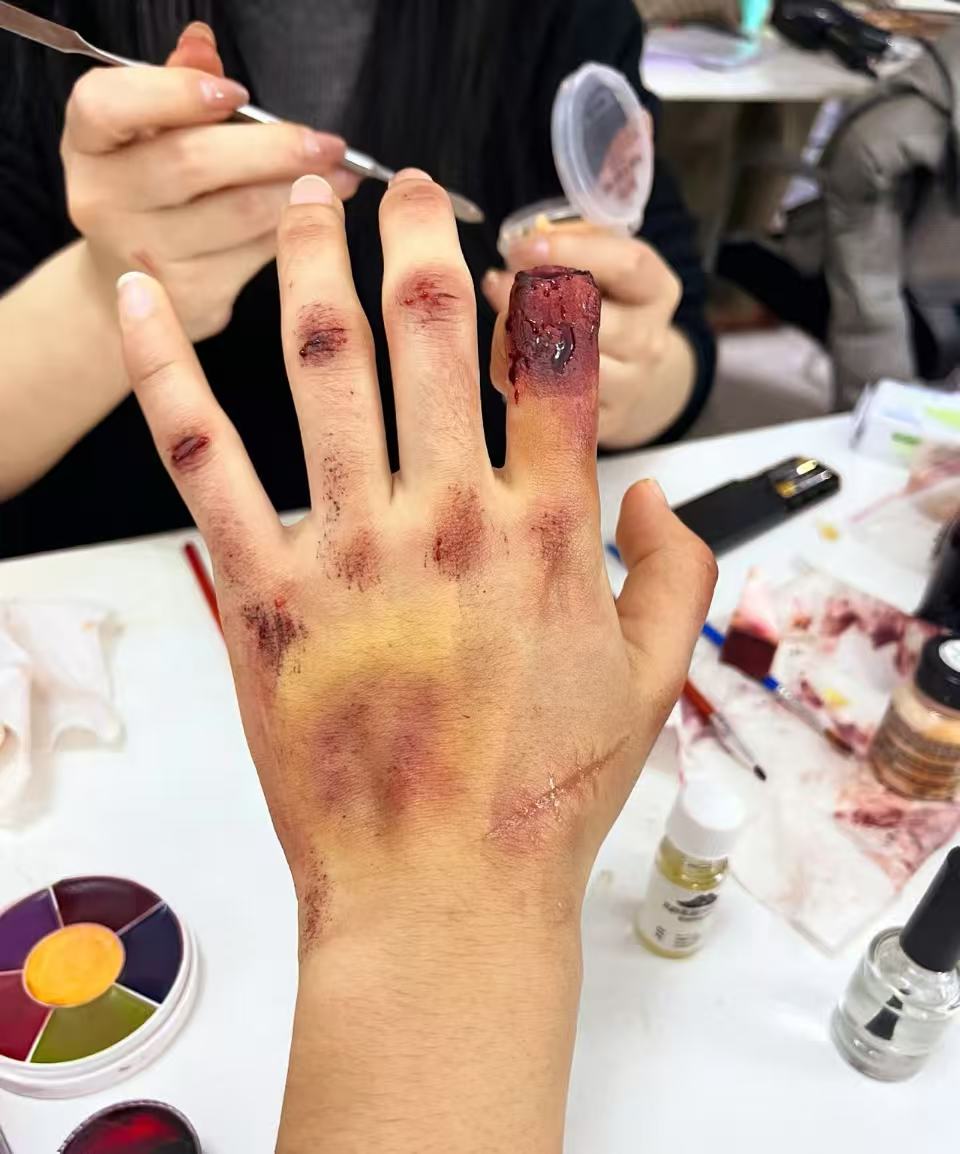
Realistic Bruises
Creating believable bruises is an essential skill when learning how to make moulage wounds at home. Unlike cuts, bruises rely entirely on color application and blending.
Step-by-Step Bruise Creation
- Base Color: Start with a reddish-purple shade applied in an irregular pattern at the center of where you want the bruise.
- Add Depth: Layer darker purple and blue shades around the edges, leaving the center slightly lighter.
- Yellowing Effect: Add touches of yellow and green around the outermost edges to simulate a healing bruise.
- Blend Thoroughly: Use a clean sponge to gently blend the colors together, creating a natural transition between shades.
- Add Texture (Optional): For a swollen appearance, apply a small amount of gelatin or wax to raise the area before coloring.
The key to realistic bruises when exploring how to make moulage wounds at home is studying reference photos of actual bruises. Notice how colors distribute and how the shape is rarely perfectly round.
Burn Effects
Burn effects require careful layering to achieve the characteristic texture and color variations. When learning how to make moulage wounds at home, burns can be challenging but highly effective.
Step-by-Step Burn Creation
- Create Texture: Mix liquid latex with a small amount of cotton fibers and apply in irregular patches to create raised, blistered areas.
- Base Coloring: Apply a base of red makeup across the entire area, extending beyond the textured sections.
- Add Burn Characteristics: Use darker red and black around the edges of the latex areas to create charred effects. Add yellow and white in the center of blisters for a fresh burn look.
- Peeling Skin: Create peeling skin effects by applying small, thin pieces of tissue paper with latex at the edges only, then lifting them slightly.
- Gloss Finish: Apply a thin layer of petroleum jelly or specialized makeup sealer to create a moist, fresh burn appearance.
Understanding burn degrees is helpful when learning how to make moulage wounds at home. First-degree burns appear red, second-degree feature blisters, while third-degree burns show charring and deep tissue damage.
Advanced Wound Techniques
Once you’ve mastered basic techniques for how to make moulage wounds at home, you can progress to more complex injuries that incorporate multiple elements and materials.
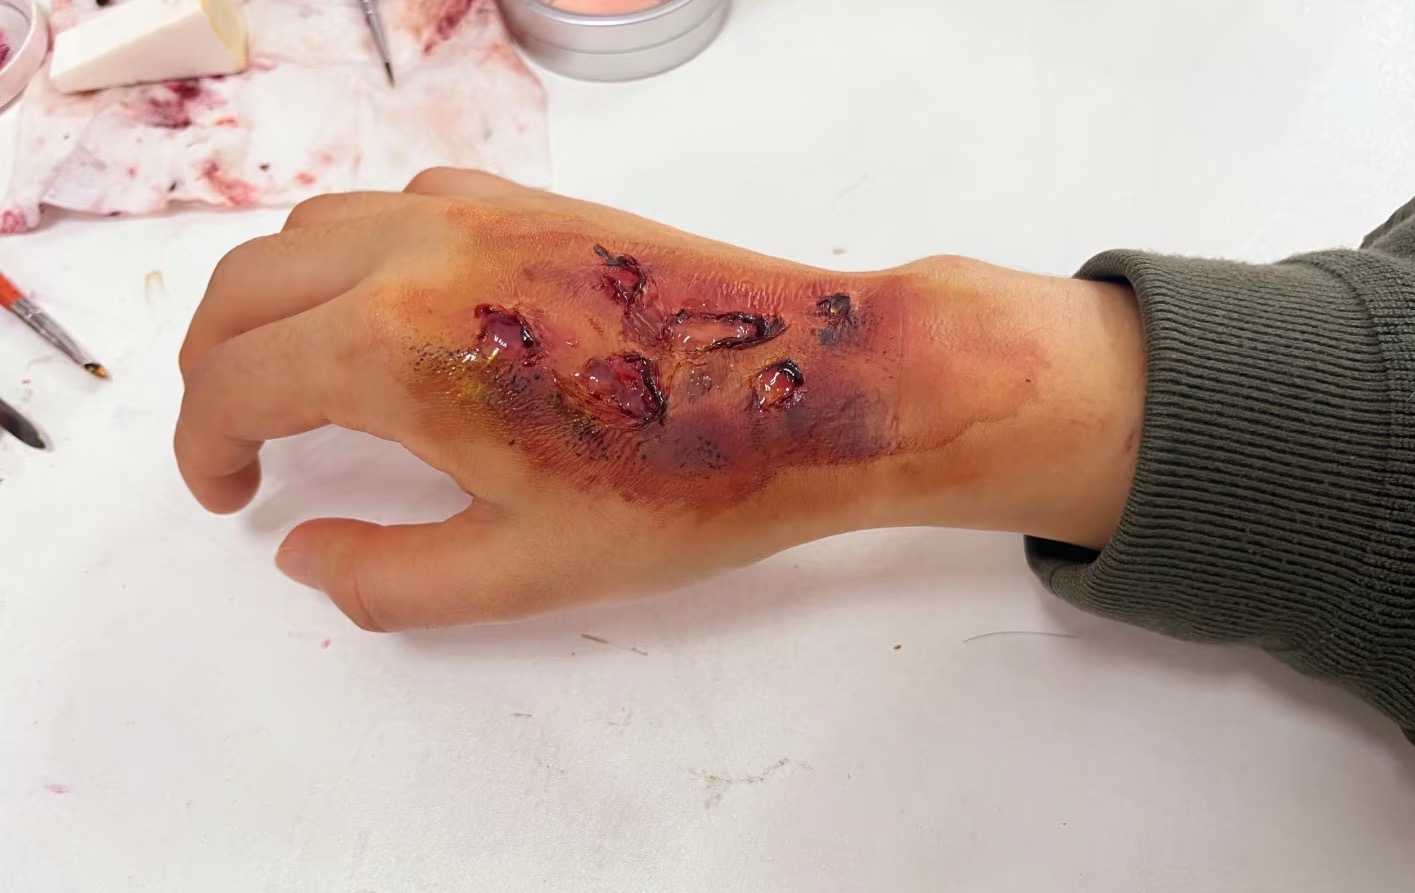
Deep Lacerations
Deep lacerations create the illusion of serious injuries with visible underlying tissue. These effects require building up multiple layers when exploring how to make moulage wounds at home.
Step-by-Step Deep Laceration
- Create the Wound Base: Apply scar wax or gelatin in a raised ridge where you want the laceration. Create a deep groove down the center.
- Add Tissue Texture: Inside the groove, apply small pieces of cotton fiber soaked in latex to create the appearance of torn tissue.
- Color the Depths: Use dark red and purple deep in the wound, transitioning to brighter red near the surface.
- Simulate Fat and Muscle: Add small pieces of gelatin tinted with yellow (for fat) and red (for muscle) within the wound.
- Blood Effects: Apply thick fake blood mixed with a small amount of oatmeal for clotting effects. Allow it to drip realistically.
These advanced techniques for how to make moulage wounds at home require more time and materials but produce highly realistic results perfect for horror effects or advanced training scenarios.
Bullet Wounds
Bullet wounds have distinctive characteristics that make them challenging but rewarding to recreate when learning how to make moulage wounds at home.
Step-by-Step Bullet Wound
- Create the Entry Point: Build up scar wax in a circular formation with a depressed center. The edge should be slightly inverted.
- Add Stippling: For close-range wounds, create powder burn effects using a small amount of black and brown makeup applied with a stippling sponge.
- Texture the Interior: Inside the depression, create torn tissue effects using cotton fibers and latex.
- Color Realistically: Use a combination of red, purple, and black to simulate tissue damage and burning.
- Exit Wounds (Optional): For through-and-through injuries, create a larger, more torn exit wound on the opposite side.
Researching actual ballistic injuries can greatly improve your results when exploring how to make moulage wounds at home. Different firearms create distinct wound patterns.
Compound Fractures
Compound fractures, where bone protrudes through skin, represent some of the most dramatic effects you can create when learning how to make moulage wounds at home.
Step-by-Step Compound Fracture
- Create the Bone: Shape a piece of thermoplastic, hardened gelatin, or even a cleaned chicken bone to simulate the protruding bone fragment.
- Build the Wound: Apply scar wax around the base of the “bone” to create torn skin and tissue.
- Color the Bone: Paint the bone with off-white and light brown shades, adding touches of red where it meets the tissue.
- Create Surrounding Damage: Build extensive bruising and tearing around the wound site using techniques from earlier sections.
- Blood and Tissue: Add copious amounts of fake blood and small tissue fragments around the base of the protruding bone.
This advanced technique for how to make moulage wounds at home requires planning and multiple materials but creates incredibly dramatic results perfect for haunted houses or advanced medical training.
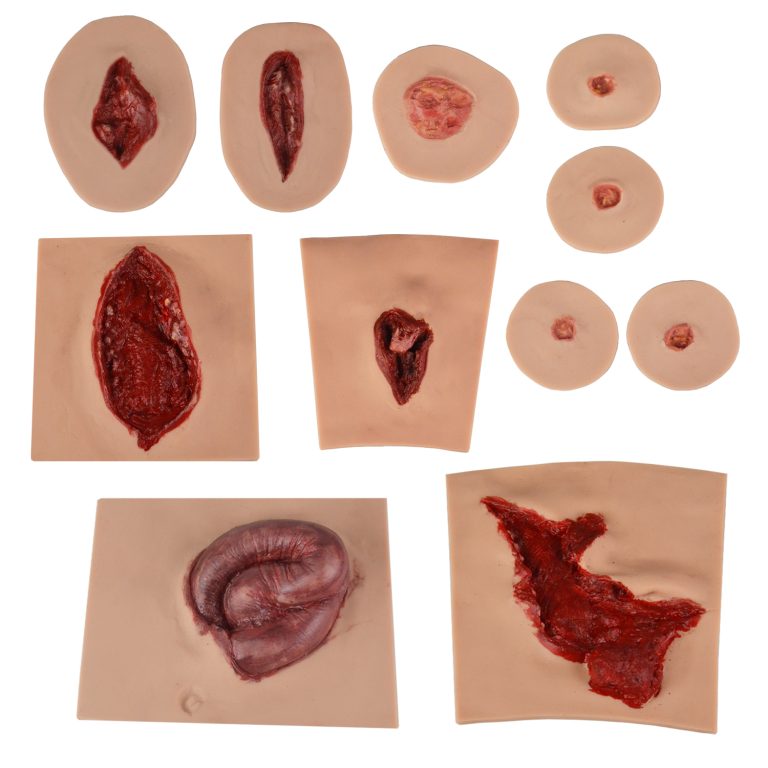
Professional Alternatives: Medtacedu Spotlight
While learning how to make moulage wounds at home is valuable for casual use and small projects, professionals in medical training, emergency response, and education often require more durable, standardized, and anatomically accurate models. This is where specialized companies like Medtacedu excel.
About Medtacedu
Medtacedu specializes in high-quality silicone and plastic models for tactical training, medical education, and science instruction. We offer a diverse selection of innovative educational models, ranging from standardized items to fully customizable solutions.
What Our Products Can Do
- Tactical Training: We provide wound dressing models, trauma manikins, and comprehensive tactical and emergency training kits to help professionals develop life-saving skills.
- Medical Demonstration, Training, and Testing: Our silicone models are designed to enhance medical training and device demonstrations, such as disease models, display device.
- Science Education: We offer customizable veterinary education models, and science education tools tailored to your specific requirements.
- Injection Models: We supply ID/SC/IM/IV Injection Training Models for Nursing Institute and Facial Injection Models for dermal and Botox Injection Training.
Why Choose Medtacedu?
- Extensive Product Range: If you’re looking to resell, we have standardized models to support your business.
- Decades of Production Expertise: With over 16 years of model production experience—including more than 6 years specializing in medical models—our team has successfully delivered complex, high-precision projects worldwide. Whether you have a fully developed design or just an idea, we can help bring it to life.
Our Product Categories
While learning how to make moulage wounds at home is perfect for individual projects, Medtacedu’s professional models offer consistency, durability, and anatomical accuracy essential for formal training environments.
Safety and Removal Tips
An often-overlooked aspect of learning how to make moulage wounds at home is proper application safety and clean removal. Following these guidelines ensures your moulage experience remains safe and enjoyable.
Safety Precautions
- Always perform patch tests for potential allergic reactions
- Avoid applying moulage near eyes, nostrils, or mouth
- Use separate applicators for different people to prevent cross-contamination
- Don’t use materials not intended for skin application
- Remove moulage immediately if irritation occurs
Effective Removal Techniques
- Latex-based Products: Gently roll or peel from the edges. Use baby oil or commercial adhesive remover for stubborn residue.
- Makeup and Creams: Remove with cold cream, makeup remover, or mild soap and water.
- Spirit Gum: Use spirit gum remover or rubbing alcohol applied with a cotton ball.
- Gelatin: Peel off carefully, then wash with warm soapy water.
Proper aftercare is also important when practicing how to make moulage wounds at home. Moisturize the skin after removal, and if any redness persists, apply a soothing lotion with aloe vera.
Homemade vs Professional Moulage Comparison
| Aspect | Homemade Moulage | Professional Models (Like Medtacedu) |
|---|---|---|
| Cost | Low (uses household items) | Higher initial investment |
| Realism | Varies with skill level | Consistently high and anatomically accurate |
| Durability | Temporary (hours to a day) | Long-lasting (months to years) |
| Preparation Time | Can be time-consuming | Ready to use immediately |
| Skill Required | Practice needed for best results | No special skills needed |
| Best For | Individual use, entertainment, small projects | Training, education, repeated use, large groups |
Understanding these differences helps determine when to apply your knowledge of how to make moulage wounds at home versus when to invest in professional solutions like those offered by Medtacedu.
Frequently Asked Questions
How long do homemade moulage wounds last?
Most homemade moulage effects last 4-8 hours, depending on materials used and activity level. Latex-based creations typically last longer than gelatin-based ones. Professional models like those from Medtacedu offer indefinite durability with proper care.
Can I use food coloring for moulage?
Yes, food coloring can be effective when learning how to make moulage wounds at home, but it may stain skin and clothing. For best results, mix food coloring with a base like Vaseline, liquid latex, or cream makeup rather than applying it directly to skin.
What’s the best fake blood recipe for moulage?
A simple and effective fake blood can be made from light corn syrup, red food coloring, and a small amount of cocoa powder for depth. For different consistencies, adjust the ratio—add more corn syrup for thicker blood, or water for thinner blood.
How can I make moulage wounds look more realistic?
Study reference photos of real injuries, pay attention to color variations (injuries are rarely one color), add texture with materials like cotton or tissue paper, and consider the wound’s context (age, cause, and healing stage). Professional models from companies like Medtacedu offer guaranteed realism based on anatomical accuracy.
Is moulage safe for children?
With close supervision and careful material selection, simple moulage can be safe for children. Avoid latex (common allergen) and spirit gum, sticking to hypoallergenic makeup, corn syrup-based blood, and gelatin. Always perform patch tests first.
When should I consider professional moulage models instead of homemade?
Consider professional models like Medtacedu’s when you need consistency for multiple training sessions, anatomical accuracy for medical education, durability for repeated use, or time efficiency for large groups. Homemade moulage is ideal for individual use, entertainment, or developing fundamental skills.
References
Conclusion
Learning how to make moulage wounds at home is an accessible and rewarding skill that opens creative possibilities for entertainment, education, and training. Starting with basic techniques using household materials allows you to develop fundamental understanding before progressing to more complex effects. Remember that practice, observation of real injuries, and patience are key to creating convincing moulage.
While homemade moulage is perfect for individual projects and developing skills, professional applications often benefit from the consistency, durability, and anatomical accuracy offered by specialized companies like Medtacedu. Whether you choose to create your own effects or utilize professional models, understanding the principles behind realistic injury simulation enhances both the creation process and final results.
With the techniques outlined in this guide, you’re now equipped to begin your journey into the art of moulage. Start simple, experiment safely, and most importantly—have fun bringing realistic effects to life!