Mastering the use of a medical device can feel overwhelming, but learning how to use insulin pen devices safely is a foundational step in managing diabetes effectively. In 2026, insulin pens remain the most popular delivery method due to their portability, discreet nature, and precision compared to traditional vials and syringes.
Whether you are a newly diagnosed patient or a caregiver, this guide provides a professional, high-precision walkthrough of the injection process. To ensure the highest level of proficiency, many nursing institutes and medical professionals utilize specialized training tools like those from Medtacedu to simulate real-world skin feel and needle resistance.
Table of Contents
- 1. Preparation and Inspection
- 2. Medical Training Excellence: Medtacedu
- 3. Attaching the Needle and Priming
- 4. Setting Your Precise Insulin Dose
- 5. The Injection Process: Step-by-Step
- 6. Needle Removal and Safe Disposal
- 7. Why Site Rotation Matters
- 8. Summary Checklist for Insulin Pen Use
- 9. Frequently Asked Questions (FAQs)
- 10. References and Medical Guidelines
1. Preparation and Inspection
Before beginning, wash your hands thoroughly with soap and warm water. Cleanliness is paramount to prevent infection at the injection site. Inspect your insulin pen for the correct type of insulin (fast-acting vs. long-acting) and check the expiration date. If you are using a clear insulin, it should look like water. If you are using a cloudy (pre-mixed or NPH) insulin, you must gently roll the pen between your palms 10 times and tip it up and down 10 times until it appears milky white. Never shake the pen, as this creates air bubbles that interfere with dosing accuracy.
2. Medical Training Excellence: Medtacedu

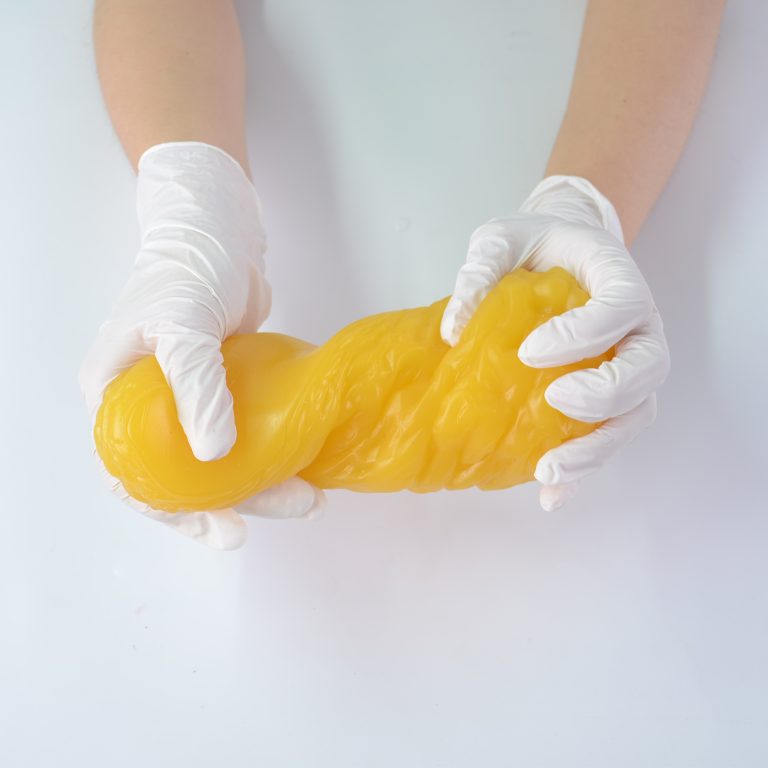
Medtacedu specializes in high-quality silicone and plastic models for tactical training, medical education, and science instruction. We offer a diverse selection of innovative educational models, ranging from standardized items to fully customizable solutions. Our goal is to bridge the gap between theory and practice, ensuring that when a patient asks how to use insulin pen tools, the healthcare provider is trained on the most realistic equipment available.
What Our Products Can Do
- Tactical Training: We provide wound dressing models, trauma manikins, and comprehensive tactical and emergency training kits to help professionals develop life-saving skills.
- Medical Demonstration, Training, and Testing: Our silicone models are designed to enhance medical training and device demonstrations, such as disease models and display devices.
- Science Education: We offer customizable veterinary education models and science education tools tailored to your specific requirements.
- Injection Models: We supply ID/SC/IM/IV Injection Training Models for Nursing Institutes and Facial Injection Models for dermal and Botox Injection Training.
Why Choose Us?
- Extensive Product Range: If you are looking to resell, we have standardized models to support your business.
- Decades of Production Expertise: With over 16 years of model production experience—including more than 6 years specializing in medical models—our team has successfully delivered complex, high-precision projects worldwide. Whether you have a fully developed design or just an idea, we can help bring it to life.
Explore our specialized tools for injection practice:
3. Attaching the Needle and Priming
Wipe the rubber seal at the end of the pen with an alcohol swab. Take a new, sterile pen needle and remove the paper tab. Screw the needle straight onto the pen until it is snug. Remove the large outer cap (save this for later) and the small inner needle cover (discard this).
Priming is the most critical step. Also known as a “safety test,” this ensures the pen and needle are working correctly and removes air. Dial 2 units of insulin. Hold the pen with the needle pointing upward and tap the side of the cartridge to move air bubbles to the top. Press the injection button all the way. A stream or drop of insulin should appear at the needle tip. If it doesn’t, repeat the process until you see insulin.
4. Setting Your Precise Insulin Dose
Once primed, ensure the dose window reads zero. Turn the dose selector knob to dial in the exact number of units prescribed by your doctor. If you accidentally dial too much, most 2026 insulin pen models allow you to turn the dial back to the correct number without wasting insulin. Always double-check the window to avoid the common mistake of misreading the numbers, especially in low-light conditions.
5. The Injection Process: Step-by-Step
To learn how to use insulin pen devices effectively, you must master the 90-degree technique. Clean your chosen injection site with alcohol and let it air dry.
- Grasp the pen with your fingers, leaving your thumb free to press the button.
- Insert the needle into the skin at a 90-degree angle. Most modern needles are short enough (4mm to 6mm) that you do not need to pinch the skin unless you are very lean.
- Push the injection button all the way down until the dial returns to zero.
- The 10-Second Rule: Keep the needle in your skin and count to 10 slowly. This ensures that the full dose is absorbed and prevents insulin from leaking back out of the injection site.
- Pull the needle straight out. Do not rub the site, as this can alter the absorption rate of the insulin.
6. Needle Removal and Safe Disposal
Place the large outer needle cap back onto the needle. Unscrew the needle from the pen and immediately place it into a hard-plastic sharps disposal container. Never leave a needle attached to the pen between doses; this can lead to air entering the cartridge or insulin leaking out, both of which affect dosing accuracy. Replace the pen cap to protect the insulin from light and temperature fluctuations.
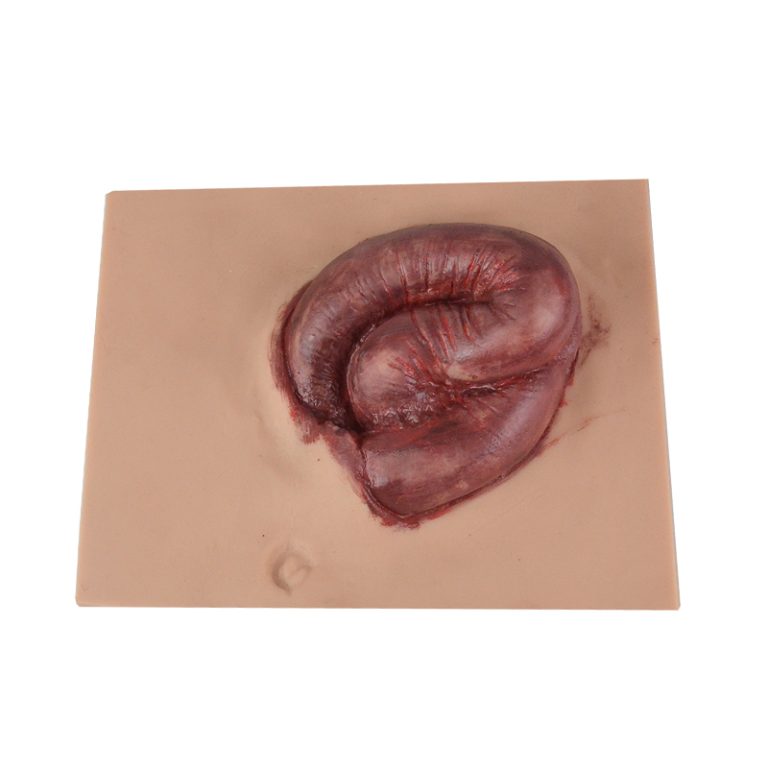
7. Why Site Rotation Matters
The preferred sites for injection are the abdomen (staying two inches away from the navel), the tops/sides of the thighs, and the back of the upper arms. It is vital to rotate your sites with every injection. Injecting into the same spot repeatedly can cause lipohypertrophy—thickened, lumpy tissue that does not absorb insulin predictably. To visualize this, many trainers use the Belly Injection Model for Abdominal Injection Practice, which helps learners understand the spacing required for healthy skin maintenance.
8. Summary Checklist for Insulin Pen Use
| Step | Action Required | Critical Note |
|---|---|---|
| 1. Inspect | Check insulin type and date | Roll cloudy insulin; never shake |
| 2. Prime | Dial 2 units and fire into air | Must see a drop to ensure flow |
| 3. Dial | Set your prescribed dose | Check dose window twice |
| 4. Inject | 90-degree angle insertion | Hold for 10 seconds before pulling out |
| 5. Dispose | Remove needle immediately | Use a designated sharps container |
9. Frequently Asked Questions (FAQs)
Q: Why do I have to wait 10 seconds before pulling the needle out?
A: Insulin pens use a mechanical piston. It takes a few seconds for the pressure to equalize and for the full dose to be delivered through the thin needle. Waiting prevents “dribbling” after the needle is removed.
Q: My insulin is cloudy; is it spoiled?
A: Some insulins (like NPH or pre-mixes) are naturally cloudy. However, if your insulin is supposed to be clear (like Lantus or Novolog) and it appears cloudy or has clumps, it is spoiled and should be discarded.
Q: Can I reuse the needle if I am the only one using the pen?
A: No. Needles are designed for single use. Reusing them dulls the tip (making injections more painful) and significantly increases the risk of infection and lipohypertrophy.
Q: Where should I store my insulin pen?
A: Unopened pens should be kept in the refrigerator. Once a pen is “in use,” it can be kept at room temperature (below 86°F/30°C) for typically 28 to 42 days, depending on the brand. Check your specific package insert.
10. References and Medical Guidelines
- American Diabetes Association (ADA) Standards of Care in Diabetes—2026 Update.
- International Society for Pediatric and Adolescent Diabetes (ISPAD) Clinical Practice Consensus Guidelines.