In the high-stakes climax of Mission: Impossible – The Final Reckoning, Benji Dunn, Ethan’s loyal tech genius, lies wounded after a brutal exchange. His breathing is ragged, his chest is visibly distended, and despite his gasps, no air is reaching his lungs. Recognizing the lethal signs of a tension pneumothorax, Benji looks to his teammate, Paris, and asks for her to perform an emergency Needle Chest Decompression (NCD).
While Hollywood loves drama, the science behind this is a matter of life and death. Based on TCCC (Tactical Combat Casualty Care) protocols, here is how to perform needle chest decompression(NCD) with improvised tools when professional medical kits are nowhere to be found.
1. Tension Pneumothorax Signs
A tension pneumothorax occurs when air enters the pleural space but cannot escape, creating a “one-way valve” effect. This pressure eventually collapses the lung and compresses the heart, leading to rapid death.
If you can see a hole in the Injured’s chest or you know the mechanism of injury, you suspect your guy has sustained a tension pneumothorax.
Any of these accompanying signs and symptoms add to the suspicion of a tension pneumothorax:
- Severe Respiratory Distress: The victim is gasping for air and looks panicked.
- Deviated Trachea: In late stages, the windpipe may look pushed to one side (away from the injured side).
- Distended Neck Veins: Veins in the neck may bulge due to pressure.
- Absent Breath Sounds: If you put your ear to the injured side of the chest, you won’t hear air moving.
- Uneven Chest Rise: One side of the chest stays “inflated” while the other moves.

2. How to perform standard Needle Chest Decompression (NCD)
If you have access to a professional first aid kit containing a 14-gauge or 16-gauge large-bore needle, you are equipped to perform a standard Needle Chest Decompression (NCD) according to TCCC protocols.
Here is the professional procedure for using these tools to save a teammate like Benji:
2.1. Identify the Needle Decompression Site
Locate the correct anatomical landmark to ensure you reach the pleural space while avoiding vital structures:
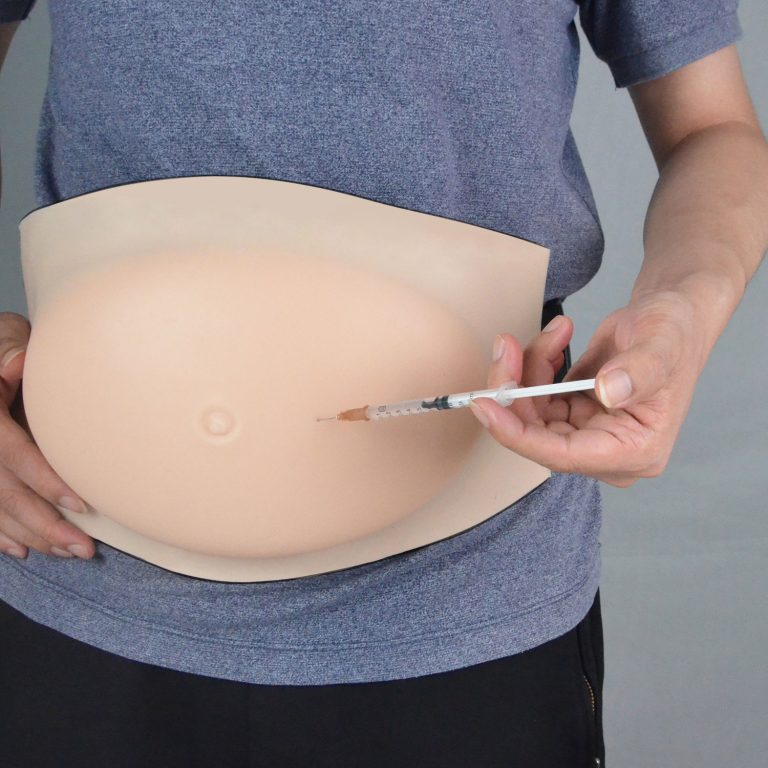
- Primary Site: The 2nd intercostal space (the gap between the 2nd and 3rd ribs) at the mid-clavicular line (straight down from the center of the collarbone).
- Alternative Site: The 4th or 5th intercostal space at the anterior-axillary line (the front edge of the armpit).
2.2. Needle Insertion Technique (Avoid the “VAN” Bundle)
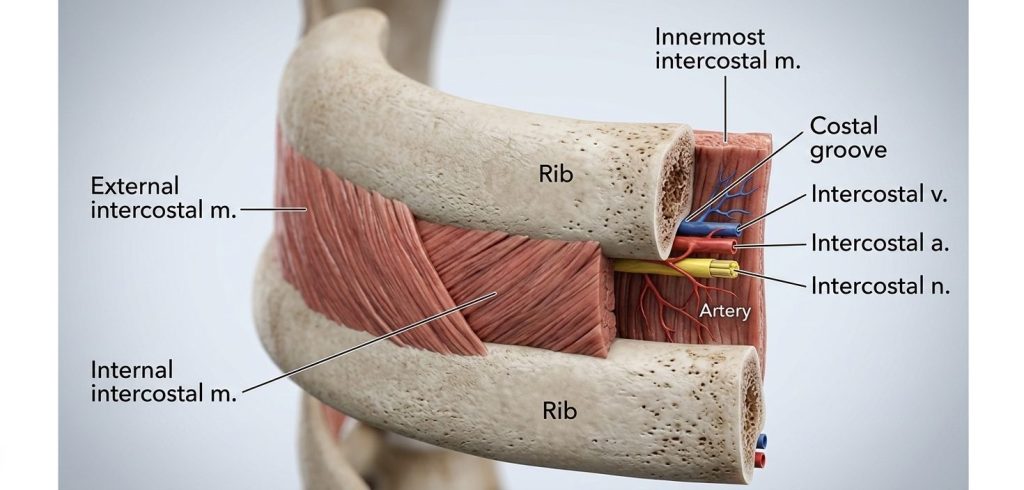
- Safety Zone: Always insert the needle just over the top (superior border) of the lower rib in the chosen space. This prevents damage to the Vein, Artery, and Nerve bundle that runs along the bottom of the rib above.
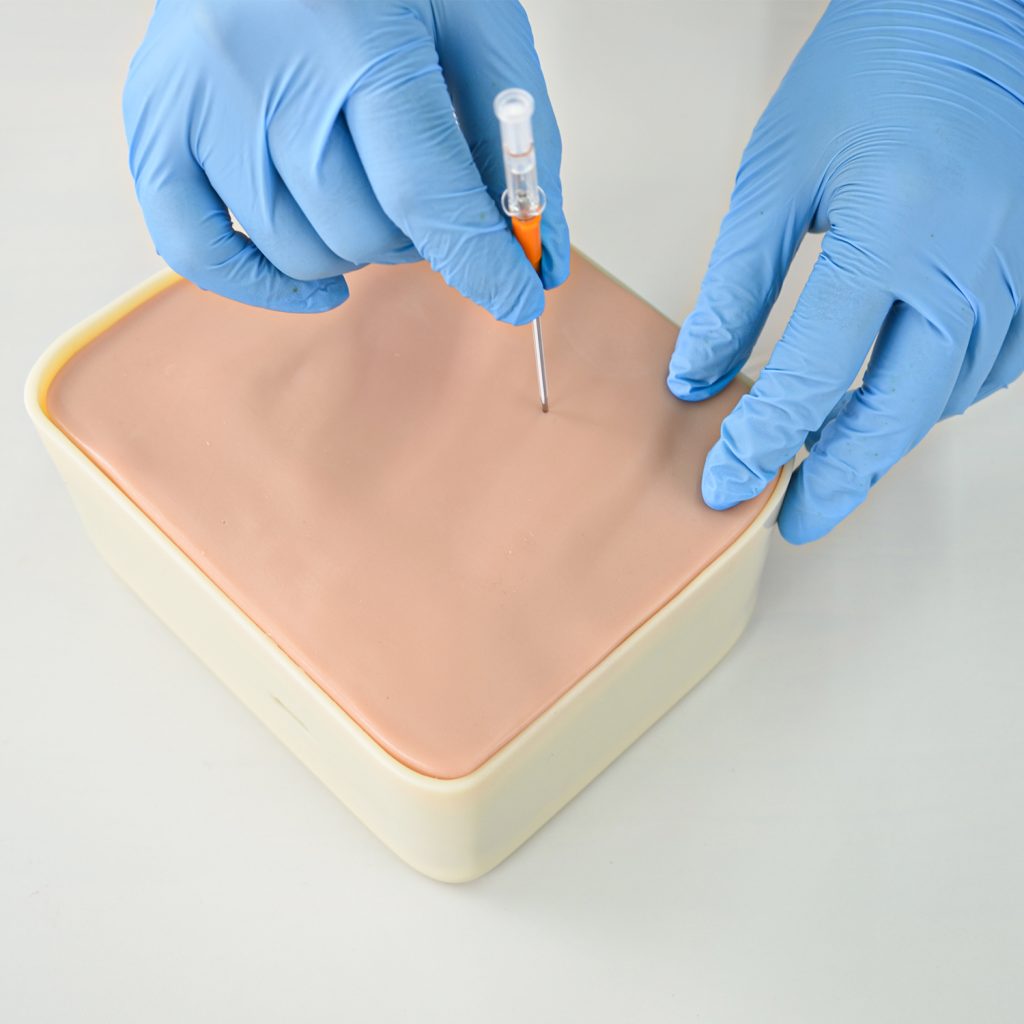
- Angle: Insert the needle at a 90-degree angle to the chest wall.
- Depth: Penetrate to a depth of approximately 5 to 8 cm in an average adult to ensure you have reached the pleural cavity.
Here is the breakdown of why we should aim for the top of the lower rib rather than the bottom of the upper rib.
2.2.1 The Anatomy of the “Intercostal Bundle”
Every rib in the human body has a groove on its underside (the inferior border) called the costal groove. This groove acts as a protected channel for three vital structures:
- Intercostal Vein: Drains blood from the chest wall.
- Intercostal Artery: Supplies high-pressure blood directly from the aorta.
- Intercostal Nerve: Provides sensation and muscle control to that section of the torso.
2.2.2 Why “Aiming High” Matters
If we inserts the needle (or knife) blindly into the middle of the gap or hugs the bottom of the upper rib, we risk severing the Intercostal Artery.
- The Danger: Because the artery is under high pressure, puncturing it can cause a massive internal hemorrhage (hemothorax). In an ironic twist, you would be saving the patient from a collapsed lung only to have them bleed to death internally.
- The Nerve: Hitting the nerve causes excruciating pain (if the patient is conscious) and can lead to long-term paralysis or chronic pain in the chest muscles.
2.2.3 The “IMF” Field Rule: “Ride the Top of the Rib”
To avoid the VAN bundle, the needle should be inserted so it literally “skims” the superior border (the smooth top edge) of the lower rib.
- Visualizing the Gap: If you are decompressing between the 2nd and 3rd ribs, you want your needle to touch the top of the 3rd rib and slide just over it.
2.3. Confirm Success
Once the needle is inserted, look for these clinical indicators of a successful decompression:
- The “Hiss”: An audible hissing or whooshing sound of air escaping as the pressure is released.
- Stabilized Breathing: A decrease in respiratory distress and a normalization of breathing rate.
- Improved Vitals: An increase in oxygen saturation (above 90%) and return of radial pulse as heart compression is relieved.
- Mental Alertness: If the victim was losing consciousness, they should become more alert.
2.4. Post-Procedure Care
- Leave the catheter in place (if it is a needle-over-catheter type) and remove only the metal needle.
- Secure the catheter to the chest to prevent it from being dislodged or kinked.
- Continuously monitor the victim; if symptoms return, the catheter may have become blocked or kinked, requiring a second decompression.
3. How to perform Needle Chest Decompression(NCD) with improvised tools
If you aren’t a combat medic or do not have first aid supplies at hand, your goal is stabilization through two critical steps: Sealing and Draining.
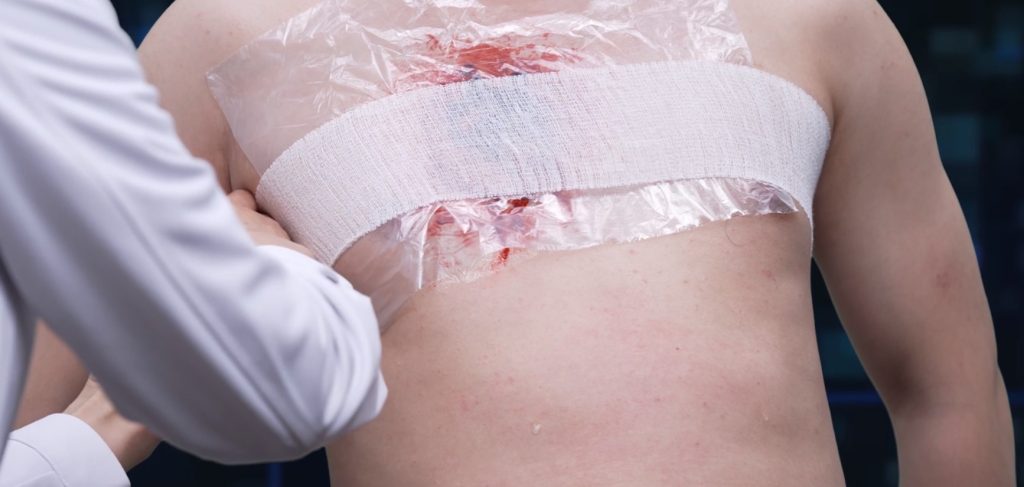
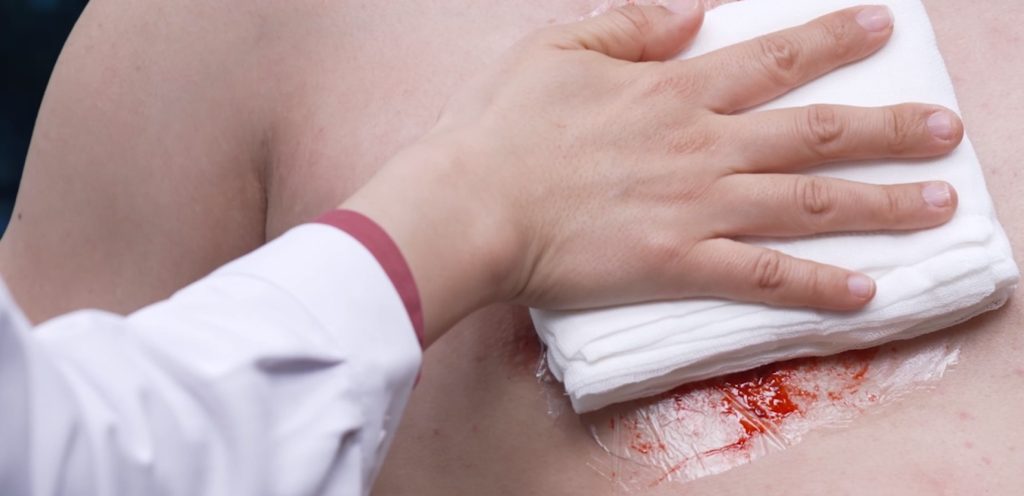
Step A: Sealing the Wound
Before the puncture, you must stop more air from being sucked in.
- The Material: Use plastic wrap, a heavy-duty plastic bag, or even a credit card.
- The Direct Contact Rule: The material must be flush against the skin. If there is clothing or fabric between the plastic and the wound, air will leak through the fibers, rendering the seal useless.
- The Fabric Alternative: If no plastic is available, you must use a very thick, dense cloth (like heavy canvas) folded multiple times to create a barrier.
Step B: The Needle Puncture (The Site and Depth)
- Location: The primary site is the second intercostal space (the gap between the 2nd and 3rd ribs) at the mid-clavicular line (straight down from the center of the collarbone).
- The Technique: Always aim for the top of the lower rib in that gap. Major nerves and blood vessels run along the bottom of each rib; hitting them causes severe secondary injury.
- The Depth: You typically need to penetrate 5 to 8cm to reach the pleural space in an average adult.
4. Improvised Tools: The “MacGyver” Method
In the field, you rarely have a 14-gauge decompression needle. Here is how to improvise using the physics of pressure:
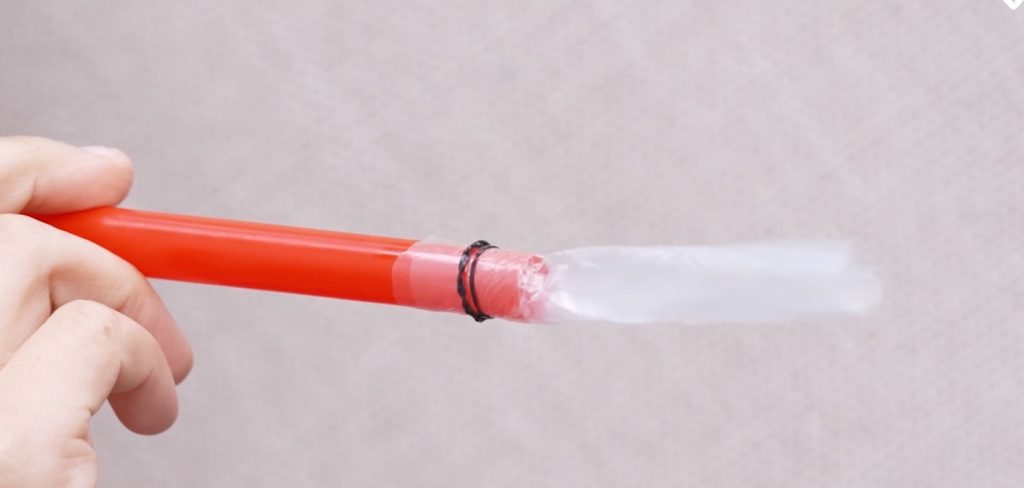
The Knife and Straw Method:
If no needle is available, use a clean knife tip to carefully puncture the chest wall. Once the “pop” is felt, immediately insert a hollow tube, such as a rigid straw or a hollowed-out pen casing. You should hear air rushing out of the tube.
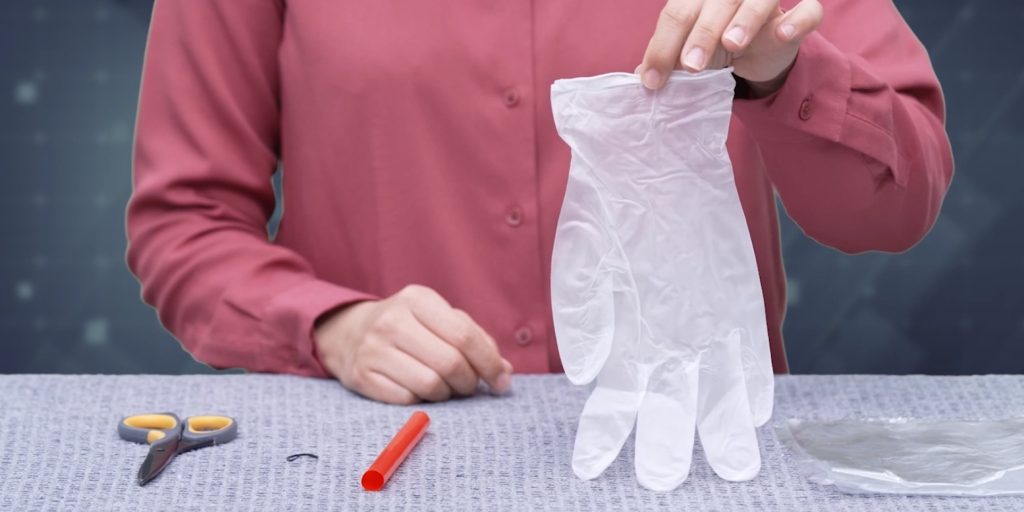
The “Glove Valve” (The Improvised One-Way Valve):
Professional kits use a one-way valve or a tension bottle. In a pinch, you can create a Finger-Glove Valve:
- Cut a finger off a disposable plastic/latex glove.
- Snip a tiny hole in the tip of the glove finger.
- Secure the base of the glove finger over the end of your straw/tube.
How it works: When the patient exhales, the pressure pushes air out through the glove. When they inhale, the thin plastic collapses on itself, preventing outside air from being sucked back into the chest.
References: