A Pap smear (Papanicolaou test) is one of the most common — and most impactful — procedures in women’s health, screening for the early cervical cell changes that can lead to cancer. This guide walks clinicians, nurses, and students through what a Pap smear is, how it differs from a pelvic exam, the equipment you need, and the step-by-step sampling technique that produces a reliable result. It is the clinical companion to our patient-facing guide on what to expect from a Pap smear test.
This article is educational and written for healthcare professionals and trainees. It describes a clinical procedure performed by qualified providers and is not instructions for self-testing.
What a Pap Smear Is — and Why It Matters
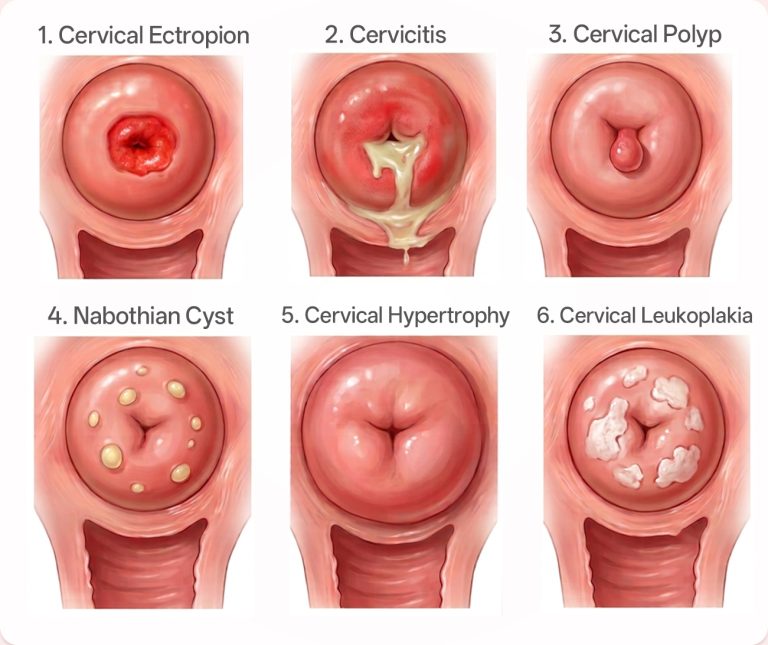
A Pap smear collects cells from the cervix (the lower part of the uterus) so a laboratory can look for abnormal changes under a microscope. Most cervical cell changes are caused by persistent infection with high-risk human papillomavirus (HPV). Catching these changes early — long before they become cancer — is what makes cervical screening one of the most successful cancer-prevention programs in medicine.
The test itself only samples cells; it does not diagnose cancer. Abnormal results are followed up with HPV typing, repeat testing, or colposcopy as indicated.
Pelvic Exam vs Pap Smear: What’s the Difference?
These terms are often used interchangeably, but they are not the same thing:
- A pelvic exam is the broader examination of the female pelvic organs. It can include inspection of the external genitalia, a speculum examination of the vagina and cervix, and a bimanual exam to palpate the uterus and ovaries.
- A Pap smear is a single step that may be done during a speculum exam: once the cervix is in view, cells are collected from it for cytology.
In other words, a Pap smear is usually performed as part of a pelvic exam, but a pelvic exam does not always include a Pap smear. Being clear on this distinction helps when explaining the visit to patients and when documenting what was actually done.
Equipment and Preparation
Have everything ready before the patient is positioned, so the procedure is quick and comfortable:
- Speculum (appropriately sized), warmed and lubricated sparingly with warm water — excess gel can interfere with the sample.
- Sampling devices: an Ayre-type spatula for the ectocervix plus an endocervical brush, or a single broom-type device for liquid-based collection.
- Collection medium: a vial of liquid-based cytology (LBC) preservative (e.g., ThinPrep, SurePath), or a glass slide and fixative for a conventional smear.
- Gloves, a good light source, drape, and the laboratory request form.
Confirm patient identity, obtain informed consent, and check timing — the test is best avoided during menstruation and when the patient has recently used vaginal products.
How to Perform a Pap Smear: Step by Step
1. Position the patient. Place her in the dorsal lithotomy position, draped for privacy, and explain each step as you go.
2. Insert the speculum. Gently insert the warmed speculum and open it to bring the cervix fully into view. Good visualisation is the foundation of a good sample.
3. Identify the transformation zone. The transformation zone (TZ) — where the squamous and columnar cells meet (the squamocolumnar junction) — is where most abnormalities arise and is the target of sampling.
4. Sample the cervix. With a spatula, rotate 360° around the ectocervix; then rotate the endocervical brush about a quarter to half turn in the canal. With a broom device, rotate it five times in one direction against the cervix.
5. Fix or transfer the sample immediately. For liquid-based cytology, swirl or detach the device head into the preservative vial. For a conventional smear, spread the cells thinly onto the slide and fix at once — do not let it air-dry, which causes artefact.
6. Remove the speculum and document. Withdraw the speculum gently, make the patient comfortable, and label the sample and request form accurately.

Getting an Adequate Sample: Common Errors to Avoid
A result is only as good as the sample. The most frequent reasons for an unsatisfactory or falsely reassuring Pap are avoidable:
- Missing the transformation zone. If the TZ isn’t sampled, true abnormalities can be missed. Always confirm you have endocervical/TZ component.
- Too little cellular material, or a device wiped rather than rotated firmly against the cervix.
- Air-drying a conventional smear before fixation.
- Obscuring blood or lubricant — minimise gel and avoid sampling during menses.
- Postmenopausal sampling difficulty: the TZ often recedes into the canal with age, so an endocervical brush is especially important.
Patient Comfort and Communication
Cervical sampling is brief but can feel vulnerable for the patient. A calm, explained approach improves both the experience and the sample:
- Talk the patient through each step and let her set the pace.
- Use the smallest comfortable speculum and warm it first.
- Encourage slow breathing and relaxation of the pelvic floor during insertion.
- Reassure her that pressure is normal but sharp pain is not — and to tell you if she needs you to pause.
After the Test: Handling and Results
Send the sample promptly with a complete request form. Most results are reported within a few weeks as normal, unsatisfactory, or showing specific cytological changes (and, where co-testing is used, an HPV result). What those results mean for the patient — and how to explain waiting times, abnormal findings, and follow-up — is covered in our patient guide to Pap smear results and aftercare.
Frequently Asked Questions (FAQ)
Liquid-based cytology vs conventional smear — which is better?
Liquid-based cytology has largely replaced conventional smears in many settings because it produces fewer unsatisfactory samples, reduces obscuring blood and debris, and lets the same vial be used for reflex HPV testing. Conventional smears remain valid where LBC isn’t available.
When should HPV co-testing be added?
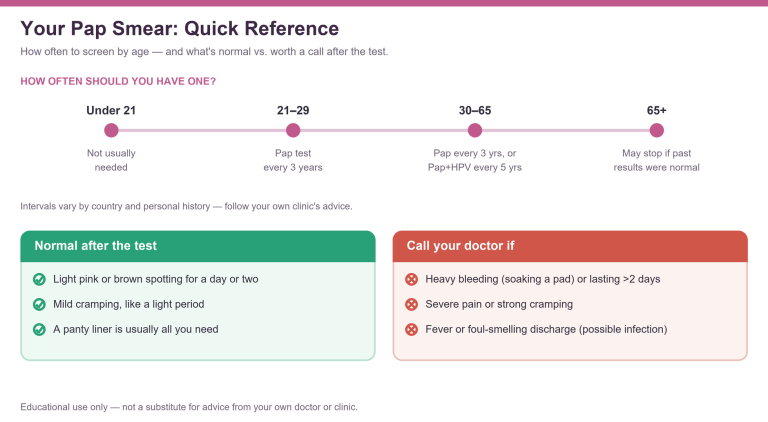
Guidelines generally reserve HPV-based or co-testing for patients aged 30 and over, where it allows longer screening intervals. Exact protocols vary by country and program — follow your local guideline.
How do you sample the transformation zone in postmenopausal women?
With age the transformation zone often retreats up the cervical canal, making it harder to reach. An endocervical brush is key, and in some cases a short course of topical estrogen before sampling is used to improve cell yield — decided case by case by the clinician.
What makes a Pap sample “unsatisfactory”?
Common reasons include too few cells, no transformation-zone component, or the slide being obscured by blood, inflammation, or lubricant — or air-drying artefact on a conventional smear. An unsatisfactory result usually means the test must be repeated.
Can a Pap smear be taken during menstruation?
It’s best avoided, because blood can obscure the cells and lead to an unsatisfactory sample. Mid-cycle is ideal where timing can be planned.
Is the procedure painful for the patient?
Most patients feel pressure and brief discomfort rather than true pain. Technique, speculum size, and communication make a big difference — we cover the patient’s perspective in detail in the patient guide.
Sources
- American College of Obstetricians and Gynecologists (ACOG) — Cervical cancer screening
- U.S. Preventive Services Task Force (USPSTF) — Cervical cancer: screening
- World Health Organization (WHO) — Cervical cancer screening and treatment
- Centers for Disease Control and Prevention (CDC) — Cervical cancer screening
- StatPearls / NCBI Bookshelf — Papanicolaou (Pap) smear
This article is for professional education only and describes a procedure performed by trained clinicians. Screening protocols and intervals vary by country and guideline — always follow your local program.
🩺 For Students & Training Teams
Speculum handling and cervical sampling are skills best rehearsed before performing them on patients. Our Pap Smear Test Model lets students practise speculum insertion, locating the cervix, and sampling technique repeatedly in a low-pressure setting.