Learning to intubate is a journey that is easier for some than for others. Regardless of how well you understand the theory of the technique, as a novice, you may struggle to bring all the elements together to successfully pass the endotracheal tube. The anatomy can be confusing, and understanding how to physically manipulate that anatomy with a laryngoscope blade is a significant challenge. All of this must be managed while remaining vigilant to protect the patient’s teeth, avoid physiological spikes in blood pressure or heart rate, and maintain regular ventilation.
According to clinical insights, there are four main barriers that inhibit the mastery of intubation:
- Failure to visualize how external anatomy links with internal structures, making it difficult to predict insertion depth.
- Failure to align the three airway axes and reveal the larynx.
- Failure to grasp the dynamic nature of the larynx, which requires active physical manipulation.
- Viewing intubation as isolated steps rather than a complex, interacting “dance” where each movement sets the stage for the next.
1. The Challenge of Visualizing Anatomy
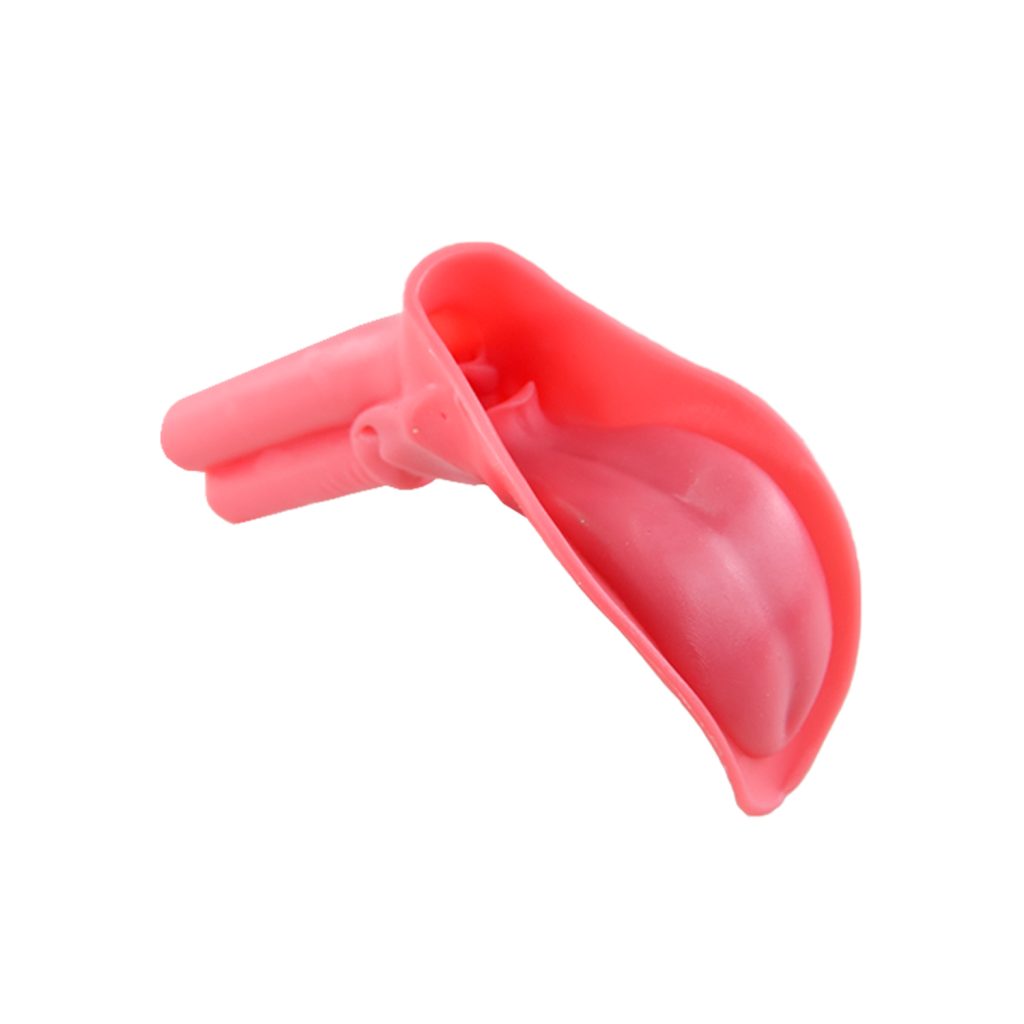
To succeed, the tip of the laryngoscope blade must be placed at the precise optimum depth to manipulate the epiglottis.
- Insertion Depth: If you go too deep, you will cover the larynx and look directly into the esophagus. If you are too shallow, you won’t have a clear view of the glottic opening or the ability to align the airway axes.
- External Correlation: You must estimate the depth of the larynx for each specific patient. The larynx lies just below the chin in the upper neck.
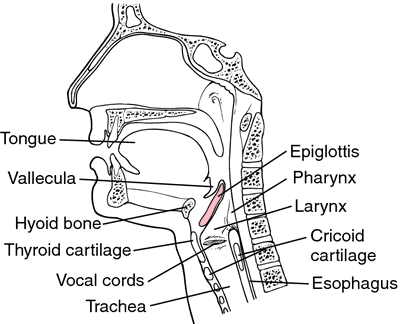
- CT Insights: Side-view imaging shows the hyoid bone is roughly level with the bottom of the mandibular bone, with the top of the thyroid cartilage just below it. Crucially, the top of the epiglottis rises higher into the posterior pharynx behind the tongue, while the vocal cords sit approximately mid-distance between the top and bottom of the thyroid cartilage.
2. Alignment of three airway axes
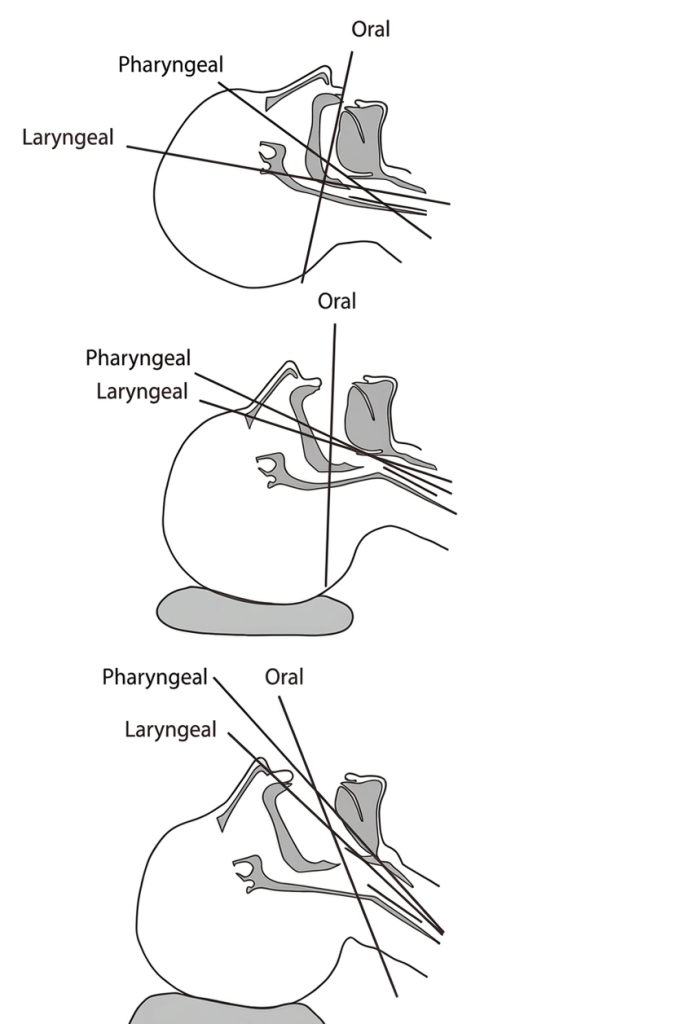
Success requires bringing the path from the incisor teeth to the larynx into a straight line. This involves aligning three distinct axes:
- The Oral Axis
- The Pharyngeal Axis
- The Laryngeal Axis (larynx and trachea)
Alignment is a matter of applied mechanics: you position the patient first, and then use the laryngoscope blade for the final adjustment.
Below three illustration shows how to align 3 airway axes in 3 steps:
- 3 axes of the airway with the head in a neutral position. In this position, the angle from the mouth to the larynx is 90°, and the angle from the pharynx to the trachea is obtuse. Notice how the axes are not aligned for easy visualization of the glottis.
- The 3 axes with the head in the “sniffing” position. It is achieved by raising the head 10 cm off the bed while leaving the shoulders down—aligns the pharyngeal and laryngeal axes. In this position, the pharyngeal and laryngeal axes are almost aligned. This mimics how we naturally straighten our airway to minimize resistance when out of breath, by holding our head forward and tilted slightly back.
- The 3 axes aligned with final adjustment of laryngoscope.
3. The Larynx as a Dynamic Structure
The larynx is not a static object; it is a dynamic valve with multiple joints and highly mobile vocal cord attachments. Mastery requires active manipulation of these joints.
Usually there are two types of blades used: Curved blade(Macintosh Blade) and straight blade(Miller Blade).
Things to note using curved blade:
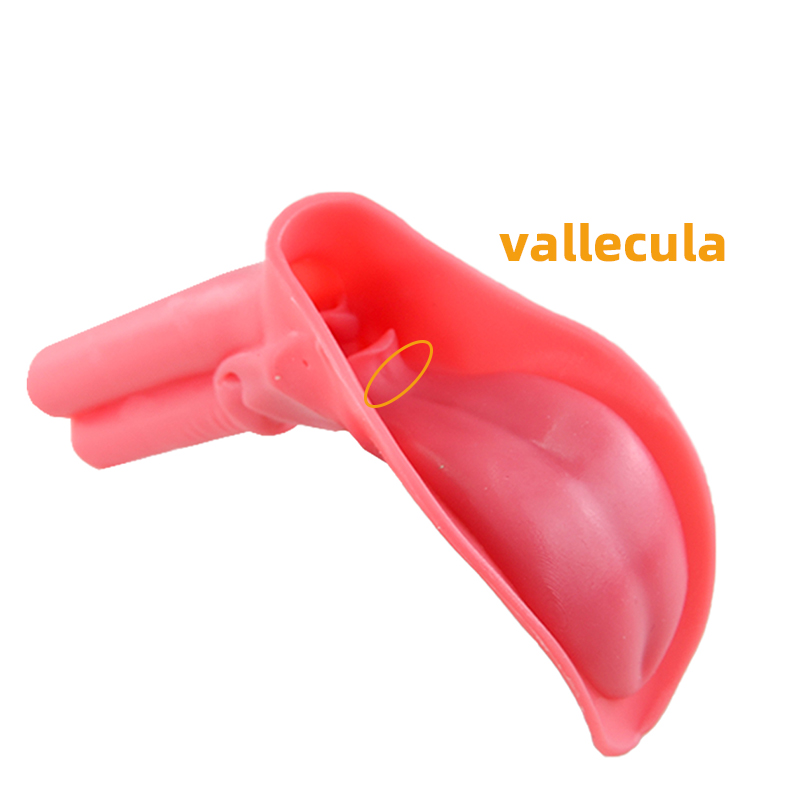
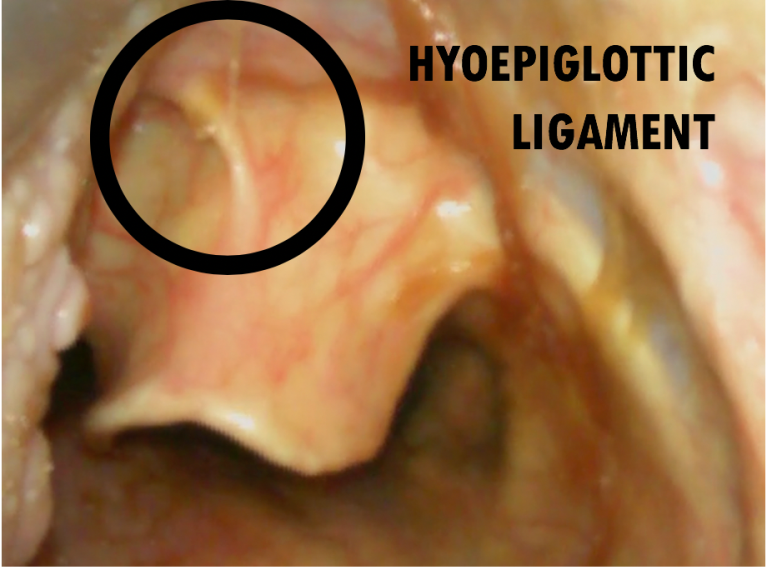
- The curved MAC blade is designed to match the tongue’s curve and put pressure on the hyoepiglottic ligament, which connects the hyoid bone to the back of the epiglottis. Pressure in the vallecula pulls this ligament upward, acting like a pulley on a trap door to swing the epiglottis up and reveal the glottis.
- Common Mistakes with the MAC Blade:
- Improper Placement: Novices frequently place the blade tip on the back of the tongue rather than the vallecula. Pressing the tongue directly can actually push the epiglottis down, obscuring the view.
- Inadequate Leverage: The pulley system requires precise pressure in the vallecula to pull the epiglottis upward. Without applying significant weight to lift the jaw and head, the system fails to engage.
- Loss of Control: A blade without sufficient weight behind it will slide freely within the mouth, making it impossible to manage the tongue or stabilize the patient’s head position.
- Over-insertion: Inserting the blade too deeply can cover the entire larynx, leaving only the epiglottis visible.
Things to note using straight blade:
When using a straight blade, the goal is to slide over the epiglottis and lift it directly while advancing toward the anterior commissure of the vocal cords.
Common Mistakes with the Straight Blade:
- Deep Insertion Errors: Failing to identify the tip of the epiglottis during the initial insertion often leads to the blade entering the esophagus.
- Missed Engagement: The blade tip must actively lift the epiglottis to flatten the tongue and reveal the airway.
- Lack of Physical Lift: Just like the curved blade, the straight blade requires a physical lift of the jaw or head. This lift is mandatory to align the airway axes and prevent the blade from sliding and losing control of the tongue.
4. The “Dance” of Interacting Steps
Intubation is not a sequence of isolated events; it is a coordinated series of movements where one hand prepares the stage for the other.
- Hand Coordination: Tilting the head with the left hand starts the alignment and prepares for the right hand to open the mouth. Once the mouth is open, the left hand inserts the blade.
- Maintaining Control: When the laryngoscope is precisely placed and lift is applied, the weight of the blade holds the head and neck in position, freeing the right hand to insert the endotracheal tube. If performed as individual steps, the “dance” becomes awkward and the process can stumble.
Conclusion
Pre-visualization, precision placement, and physical control are the keys to success. If you are being gentle, you can trust yourself to physically lift and maneuver these structures to create the view you need. Mastery comes when you stop following a list of steps and start coordinating a series of mechanical adjustments to the patient’s anatomy.
Glossary of intubation
Pharynx: The pharynx, commonly known as the throat, is a muscular tube that serves as a shared gateway for air and food. It stretches from the nasal cavity to the esophagus and is divided into three sections: Laryngopharynx, Nasopharynx, Oropharynx
Larynx: The larynx, or voice box, sits just below the pharynx and above the trachea. It’s a complex structure composed of cartilage, muscles, and ligaments, housing the vocal cords. Key components include: Epiglottis, Thyroid Cartilage, Cricoid Cartilag
Vallecula: The epiglottic vallecula is a small, V-shaped groove or pocket located at the base of the tongue, just in front of the epiglottis.
Hyoepiglottic ligament: The hyoepiglottic ligament is an extrinsic ligament of the larynx connecting the epiglottis and the hyoid bone
References
https://airwayjedi.com/2018/01/15/when-learning-intubation-is-hard
https://5minuteairway.com/2019/11/25/the-hyoepiglottic-ligament
https://medical-dictionary.thefreedictionary.com/epiglottis
Bridge the gap between theory and muscle memory with our Compact Endotracheal Intubation Model — a silicone airway trainer that lets you practice blade placement, axis alignment, and tube passage repeatedly before your first live patient. Explore the full Airway, Chest & Drainage Trainers range for all your airway simulation needs.
🩺 Recommended Training Tools
- Compact Endotracheal Intubation Model — Silicone airway trainer for practicing laryngoscope placement and ET tube insertion.
- Wearable Cricothyroid Puncture Model — Wearable trainer for emergency cricothyrotomy technique when intubation fails.
Disclaimer: This article is for educational purposes only and is not a substitute for professional medical advice, diagnosis, or treatment. Always consult a qualified healthcare professional. Last updated: June 2026.