Introduction: The Precision Behind the Sample
In veterinary diagnostics, the integrity of a blood sample is the foundation of an accurate diagnosis. Venipuncture—the process of puncturing a vein to collect blood—is one of the most frequently performed procedures in a clinic. Yet, its frequency should never lead to complacency.
A “difficult stick” does more than just stress the animal; it can lead to hemolysis (the rupture of red blood cells), platelet clumping, or hematoma formation, all of which compromise the laboratory results. For veterinary students and nurses, mastering venipuncture is a journey from understanding anatomy to developing a “tactile intuition.” This guide explores the best practices to ensure a successful, high-quality blood draw on the first attempt.
Quick Answer: Which Vein Is Used for a Dog Blood Draw?
Canine venipuncture collects a diagnostic blood sample; it is not the same task as placing an IV catheter for fluids or medication. The jugular vein can provide a larger, faster sample when the patient and bleeding risk make it appropriate. The cephalic vein is convenient for smaller peripheral samples, while the lateral saphenous is a useful alternative when positioning, temperament, or preservation of another site makes it preferable. Choose the site according to the volume required, patient stability, restraint, bleeding risk, and whether a limb vein needs to remain available for IV access.
| Site | Common use | Important limitation |
|---|---|---|
| Jugular | Larger or time-sensitive diagnostic samples | Avoid when neck access, restraint, or bleeding risk makes the site unsuitable |
| Cephalic | Smaller peripheral samples and routine collection | The vessel can roll; using it may also affect a site needed later for an IV catheter |
| Lateral saphenous | Alternative peripheral access, including some side-on restraint positions | Skin and vessel movement require stable positioning and anchoring |
Detailed guides for each collection site
This page covers site selection, sample quality, and technique across all canine collection sites. Each site also has a dedicated guide:
- Dog Jugular Vein Phlebotomy — restraint, landmarks, and the step-by-step neck draw for larger or time-sensitive samples.
- Difficult Canine Jugular Venipuncture — what to change after a failed stick, and how to approach fractious, dehydrated, or bleeding-risk patients.
- Canine Lateral Saphenous Vein Blood Draw — hindlimb positioning and vein stabilization when a limb vein is the better choice.
- Canine IV Catheterization — the separate task of placing an indwelling catheter for fluids or medication.
- Dog Injections: SC vs IM — choosing the route when the plan is to give a drug rather than take a sample.
1. Clinical Anatomy: Selecting the Right Vessel
Selecting the appropriate site is a strategic decision based on the patient’s size, temperament, and the volume of blood required.
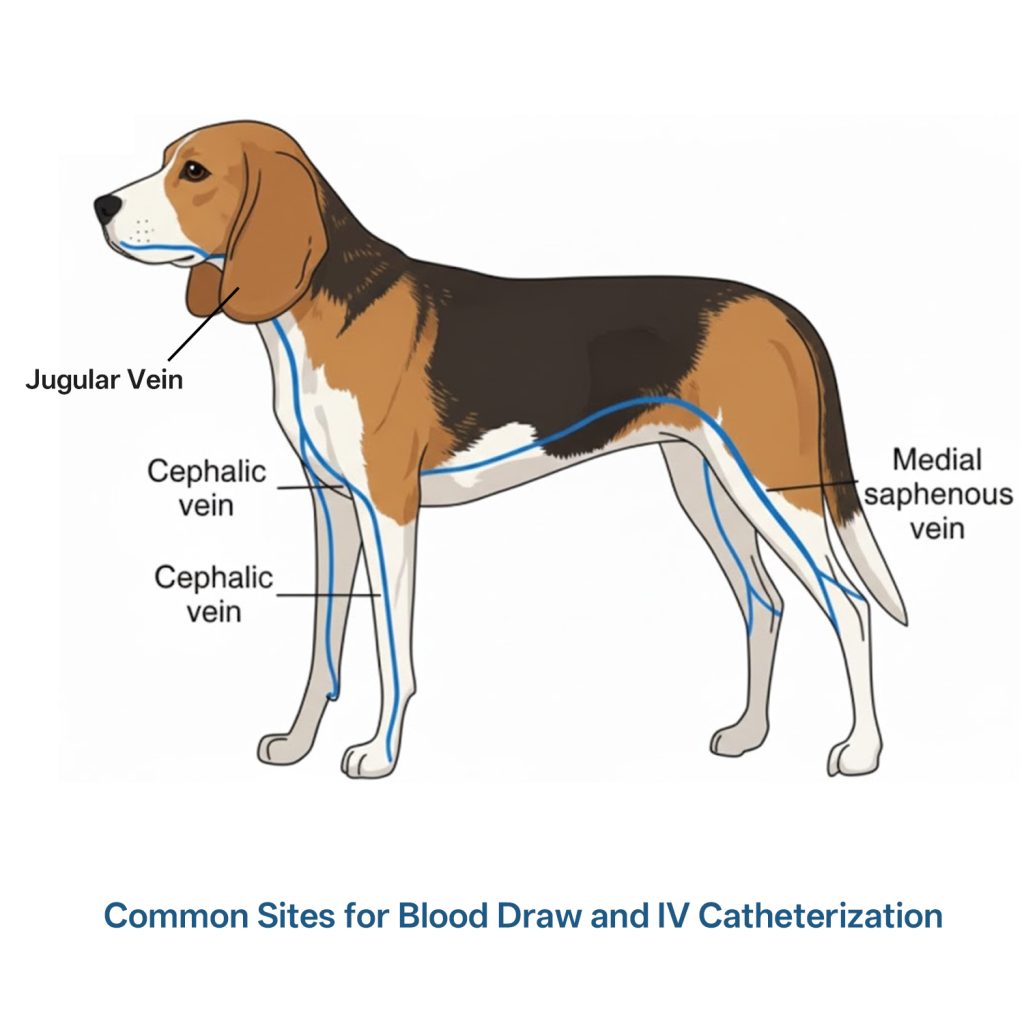
1.1 The Jugular Vein: For High Volume and Integrity
The jugular vein, located in the neck, is the preferred site for large volume collection (e.g., complete blood counts and chemistry panels).
Why it’s used: It provides a rapid flow of blood, minimizing the time the needle stays in the vessel.
Clinical Pearl: Using the jugular prevents “peripheral vein depletion,” saving the leg veins for potential IV catheterization later.
1.2 The Cephalic Vein: The Standard for Small Samples
Located on the dorsal aspect of the forelimb, this is the most common site for quick diagnostic tests or heartworm screenings.
Challenge: The cephalic vein is prone to “rolling.” Successful collection requires firm skin tension to anchor the vessel.
1.3 The Lateral Saphenous Vein: An Alternative Peripheral Site
Found on the lateral aspect of the hindlimb, this vein is often more visible in certain breeds and allows the technician to work at a safe distance from the animal’s head.
2. Pre-Analytical Considerations: Preparing for Success
2.1 Equipment Readiness
A common mistake is selecting a needle that is too small. While it seems “kinder,” a 25g needle often causes hemolysis due to the sheer force required to pull blood through a narrow lumen.
Best Practice: Use a 20g or 22g needle for most medium-to-large dogs.
Syringe vs. Vacutainer: Syringes allow for manual control of vacuum pressure—crucial for fragile or collapsed veins.
2.2 Patient Positioning and Restraint
Effective restraint is 50% of the procedure. The “holder” must not only keep the dog still but also “occlude” or “off” the vein correctly to allow it to distend. Over-occlusion can lead to vessel collapse, while under-occlusion makes the vein hard to visualize.
2.3. Preparation: To Shave or Not to Shave?
One of the most common questions from junior technicians is whether it is mandatory to shave the patient before performing Canine Venipuncture. The answer depends on the clinical goal.

2.3.1 When Shaving is Mandatory
For surgical patients or those requiring long-term IV catheterization, shaving is non-negotiable.
- Surgical Asepsis: Removing the hair allows for a true surgical scrub, significantly reducing the risk of introducing bacteria into the bloodstream.
- Visualization: In breeds with thick, dark, or wiry coats (like Schnauzers or Poodles), shaving is the only way to accurately visualize the vein and monitor for hematoma formation.
2.3.2 The “Alcohol Only” Approach
For a routine, quick blood draw in a healthy patient, many clinics use 70% Isopropyl Alcohol to “part” the fur.
- Pros: It is faster and aesthetically preferable to owners of show dogs or long-haired breeds.
- Cons: Alcohol alone does not sterilize the skin; it only cleans the surface and flattens the hair to reveal the vein.
2.3.3 Clinical Best Practice
If you decide not to shave, you must be able to palpate the vein with 100% certainty. If the patient is dehydrated, has a thick coat, or is a “difficult stick,” shaving a small patch is the professional choice. It is always better to have a small shaved area and a successful first-attempt Canine Venipuncture than multiple failed attempts through thick fur.
Expert Tip: Always ask the owner first if the dog is a show animal. If you must shave, use a #40 clipper blade for a clean, surgical finish that minimizes “clipper burn.”
3. Determining the Volume: How Much Blood Should You Draw?
Deciding on the volume for Canine Venipuncture involves a balance between diagnostic requirements and patient safety.
3.1 The “Golden Rule” of Sample Volume
The total volume drawn should be 3 times the amount of blood needed for the tests, provided the patient is stable. This allows for:
Duplicate Testing: If the lab machine flags an error.
Add-on Tests: If the veterinarian decides to add a test after the initial results.
Dead Space: Accounting for the small amount of blood left in the needle hub or syringe tip.
| Test Type | Common Tube Color | Required Volume | Why? |
| CBC (Complete Blood Count) | Purple (EDTA) | 0.5 – 2.0 mL | Prevents platelet clumping; requires precise blood-to-EDTA ratio. |
| Chemistry / Serology | Red or Tiger Top | 2.0 – 5.0 mL | Needed for serum separation; larger volumes yield more serum. |
| Coagulation Profile | Blue (Citrate) | Exactly to the Fill Line | Critical: Must be a 9:1 blood-to-citrate ratio for accurate results. |
3.2 Safe Limits for Small or Critical Patients
For very small dogs or anemic patients, you must calculate the “Safe Draw Limit.”
The Limit: Never exceed 1% of the dog’s body weight (in kilograms converted to liters) or 10% of the total blood volume in a single draw.
Example: For a 5kg dog, the total blood volume is roughly 400mL. You should not draw more than 4mL at once if the patient is compromised.
4. Step-by-Step Procedure: The “Clean Stick” Technique
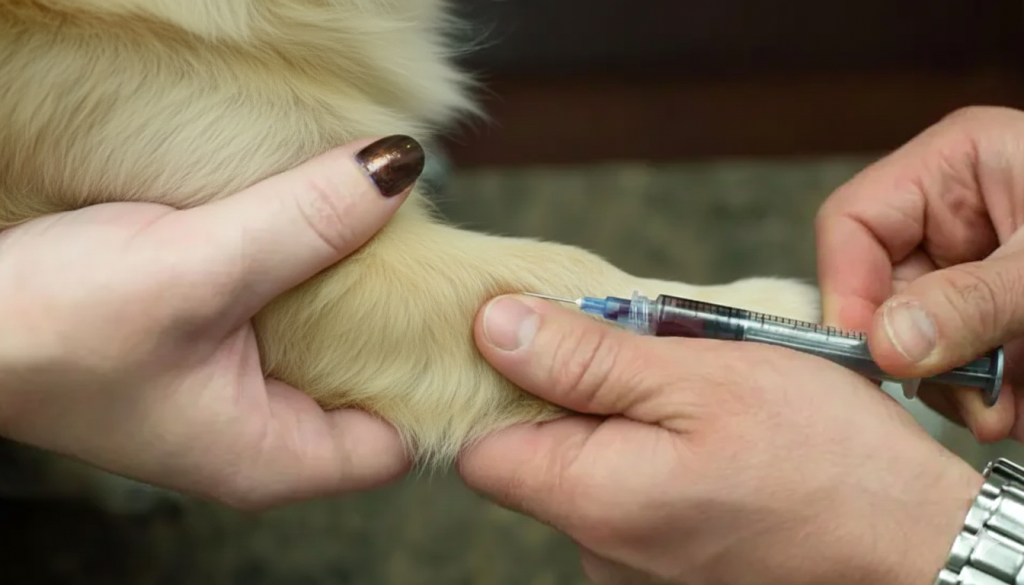
Step 1: Site Visualization and Palpation
Apply alcohol to flatten the fur and enhance visibility. Don’t just look; palpate. A visible vein may be superficial and prone to rolling, whereas a palpable, “bouncy” vein is usually more stable.
Step 2: The Approach
Hold the syringe with the bevel of the needle facing up. Enter the skin at a 25-degree angle. For the cephalic vein, use your non-dominant thumb to pull the skin distally, which “pins” the vein against the bone.
Step 3: The Puncture and Flashback
Enter the vein with a smooth, swift motion. Unlike IV catheterization, where you might “seek” the vessel, venipuncture should be a targeted strike to avoid trauma to the vessel wall. Upon seeing the “flash” of blood, stabilize your hand against the dog’s limb to prevent accidental withdrawal.
Step 4: Aspiration with “Gentle Vacuum”
Slowly pull back on the plunger. If you pull too hard, the negative pressure will cause the vein wall to be sucked against the needle tip, stopping the flow. This is the “sweet spot” of tactile feedback that takes years to master.
5. Troubleshooting: Handling the “Difficult Draw”
5.1 What to do when the flow stops?
If blood flow ceases mid-collection, the needle tip may have moved against the vessel wall. Gently rotate the needle or slightly adjust the depth. Do not “fish” (aggressive redirection), as this causes pain and internal tissue damage.
5.2 Managing Hematomas
If a hematoma (swelling under the skin) begins to form, it means blood is leaking from the puncture site. Stop the procedure immediately and apply firm pressure for at least 60 seconds. Continuing to draw from a blown vein will only result in a contaminated sample.
6. Post-Collection Care: Sample Handling
Once the blood is collected, the work isn’t over.
Anticoagulant Mixing: Gently invert (do not shake) tubes containing EDTA or Heparin.
Pressure Bandage: Apply a small bandage to the site, but instruct the owner to remove it within 30 minutes to prevent circulation issues.
Conclusion
Canine Venipuncture is an art form as much as it is a clinical skill. It requires a deep understanding of canine anatomy, a calm demeanor, and a disciplined technique. By prioritizing preparation, mastering the nuances of pressure, and utilizing simulation-based training to hone your skills, you ensure the highest standard of care for your patients and the most accurate data for your diagnostic team.
Frequently Asked Questions About Dog Blood Draws
Does a dog need to fast before a blood draw?
It depends on the test. Many routine blood tests don’t require fasting, but for a lipid panel and some glucose or pancreatic (lipase) tests, a fast of roughly 8–12 hours is usually recommended — recent food, especially fatty food, causes lipemia (fat in the blood) that can skew results. Water is generally fine. Always follow your veterinarian’s specific instructions, and never fast a puppy or a diabetic dog without veterinary guidance.
Can a dog have a bath after a blood draw, and how long should you wait?
It’s best to keep the puncture site clean and dry for a short while. Leave any small bandage on for a few hours, and wait about 24 hours before bathing so the tiny puncture can seal and the risk of infection stays low. Normal gentle activity is fine — just avoid soaking the site right away, and watch for any swelling or bleeding.
What should you do if you can’t find the vein when drawing a dog’s blood?
This is a common challenge. First, check the basics: proper restraint and correct occlusion (holding off the cephalic vein at the elbow, or the jugular at the thoracic inlet) make a vein far easier to find. A warm compress helps dilate the vessel, and clipping the fur plus wetting the skin with alcohol improves visibility. If peripheral veins are difficult, the jugular is larger and more reliable, and the lateral saphenous is another option. Dehydrated, very small, or hypotensive patients have collapsed veins, so addressing fluid status helps. For students, practising on a training model first builds the palpation skill that makes this much easier. If several attempts fail, stop and let a more experienced colleague try rather than repeatedly traumatising the vein.
Related guide: Drawing blood is closely related to placing a line for fluids or medication. For that procedure, see our step-by-step guide to canine IV catheter placement.
References & Further Reading
- Merck Veterinary Manual — Clinical Pathology and Diagnostic Procedures (merckvetmanual.com)
- Today’s Veterinary Nurse — venipuncture and blood-collection technique resources (todaysveterinarynurse.com)
- American Veterinary Medical Association — clinical and patient-care guidance (avma.org)
Disclaimer: This article is for educational purposes only and is not a substitute for professional veterinary advice, diagnosis, or treatment. Always consult a licensed veterinarian regarding your animal’s health. Last updated: August 2026.
Related Canine Clinical Skills Guides
- Canine IV Catheterization — placing an IV catheter and running IV fluids.
- Dog Injections: Subcutaneous (SC) vs Intramuscular (IM) — choosing and giving the right medication route.
- Subcutaneous Fluids for Dogs — giving hydration fluids at home, step by step.
- Dog Jugular Vein Phlebotomy — positioning, landmarks, and step-by-step jugular blood collection.
- Difficult Canine Jugular Venipuncture — failed draws, complications, and special-patient troubleshooting.
- Canine Lateral Saphenous Vein Blood Draw — hindlimb positioning and vein stabilization for the saphenous site.
- How to Set Up a Dog IV Practice Kit — assembling and priming a training leg before practice.
- How to Intubate a Dog — airway preparation, tube selection, placement, and confirmation for canine anesthesia.
Training Resources
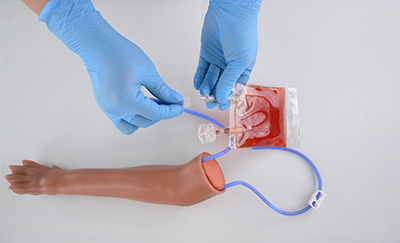
Veterinary learners can practice vein palpation, flashback recognition, blood draw, catheter advancement, infusion, and taping before supervised work with live patients. The Canine IV Training Model (MT00513) is the four-piece basic set; the Dog IV Practice Kit (MT00521) is the full dog leg IV catheter kit, adding a broader set of fluid, catheter, taping, and preparation accessories. For feline practice, see the Veterinary Cat IV Practice Kit.