Placing a canine IV catheter quickly and cleanly is one of the defining skills of small-animal practice. Fluid therapy, anaesthesia, emergency drugs, blood products — almost every critical intervention depends on reliable venous access. Yet “get the catheter in” hides a stack of small decisions that separate a calm first-stick from a blown vein and a stressed patient. This guide breaks canine IV catheterization down the way an experienced technician actually thinks about it: site selection, the mechanics that decide success, a step-by-step placement sequence, and the complications you need to recognise early.
Quick Answer: How Is a Canine IV Catheter Placed?
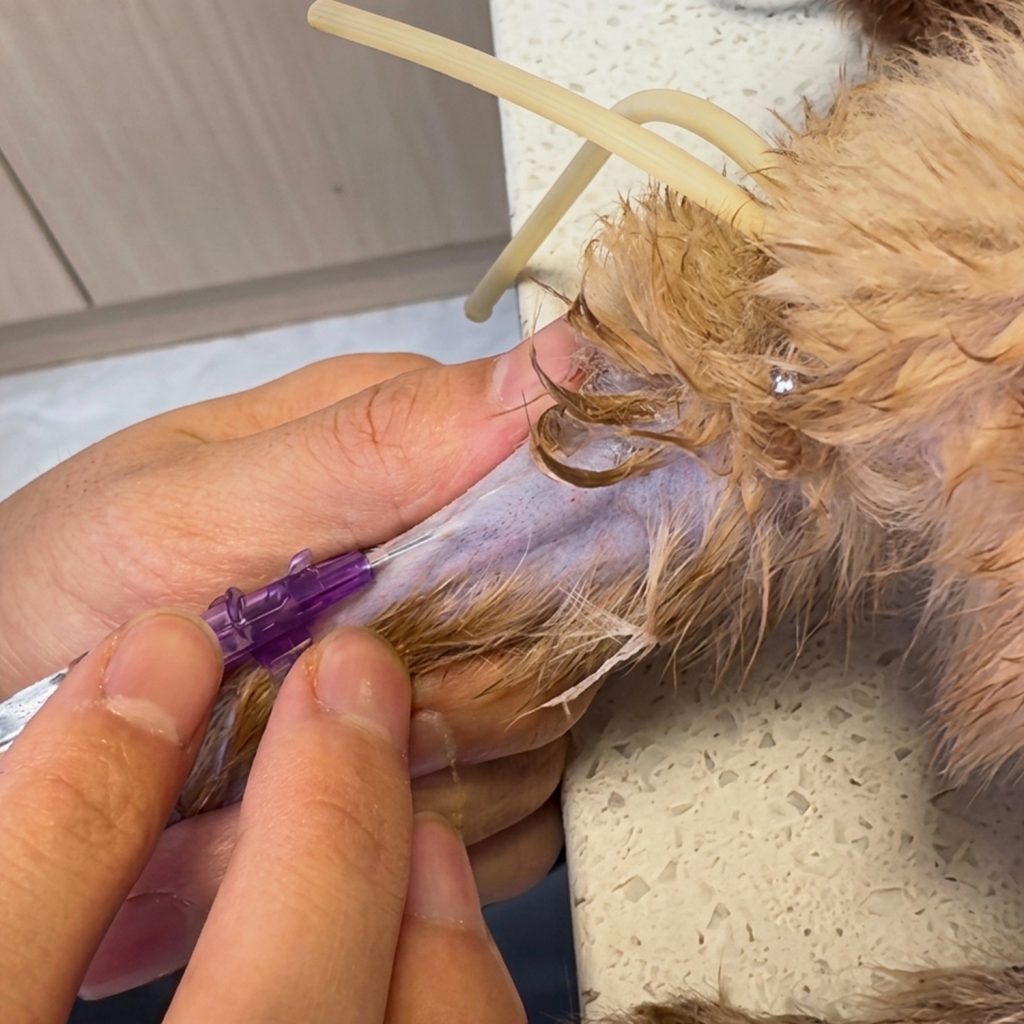
For routine peripheral access, the cephalic vein is commonly used; a saphenous vein may be selected when the forelimb is unsuitable. After the vessel is raised and anchored, the catheter is introduced at a low angle. Once blood flashback appears, advance the needle-and-catheter unit slightly so the catheter tip also enters the lumen, then hold the stylet still and thread the catheter forward. Confirm patency with a gentle flush and check for resistance, pain, or swelling before securing the line. If the catheter will not advance, the flush meets resistance, or swelling appears, stop rather than force or probe. Withdraw, apply pressure, and ask an experienced veterinary professional to reassess the site.
Training boundary: IV catheter placement is an invasive procedure for trained veterinary personnel and supervised learners. It should not be attempted by pet owners at home.
Choosing the Site: Cephalic, Saphenous, or Jugular
Vein selection is where most failures actually begin. Match the vein to the patient and the purpose, not just to habit.
- Cephalic vein (the default): Runs up the cranial surface of the antebrachium. Superficial, easy for a restrainer to hold off at the elbow, and ideal for routine fluids and most medications. Its weakness is that it rolls — the single biggest cause of “I keep just missing.”
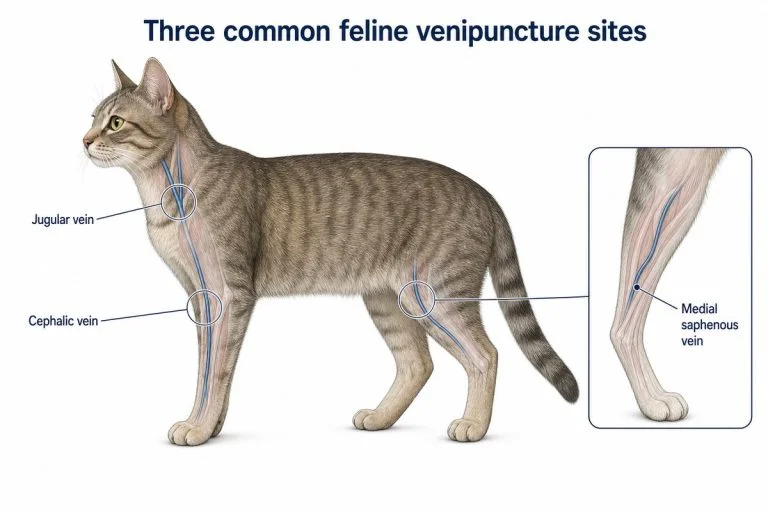
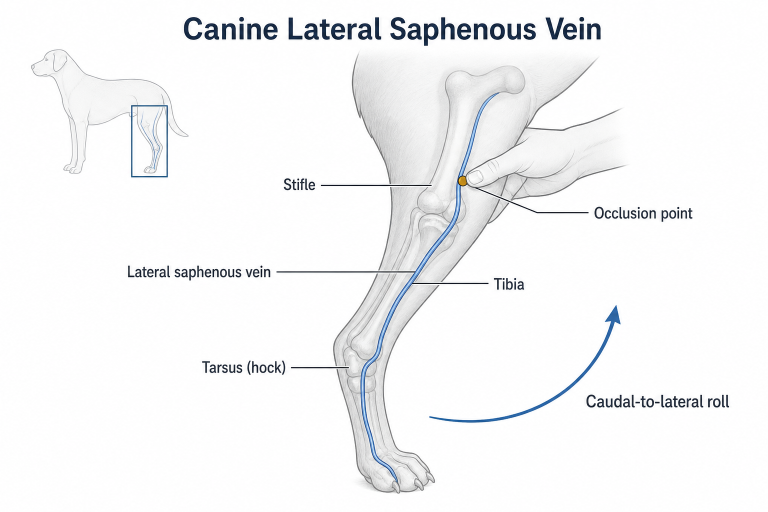
- Lateral saphenous vein: On the lateral aspect of the distal hindlimb. A reliable backup when both cephalics are bruised or in use, and useful in recumbent patients. Tends to roll more, so anchoring is critical.
- Jugular vein: Reserved for large-bore access, central venous pressure monitoring, high-volume sampling, or hypotensive patients with poor peripheral filling. Higher skill, higher reward — not a first catheter for a novice.
Catheter sizing: select the largest catheter that fits comfortably in the vein and is appropriate for the intended therapy, rather than working from a fixed size-for-body-weight rule. Where rapid fluid resuscitation is the goal, a short, large-bore catheter is preferred — flow rate rises steeply with diameter.
The Mechanics That Decide Success
Before the needle ever moves, three things must be right. Coach these as deliberately as the stick itself.
- Restraint and occlusion: The restrainer holds the limb steady and occludes the vein at the elbow, rolling the thumb slightly laterally to both distend the vein and stop it rolling medially. A perfect technique fails against a poorly held leg.
- Anchoring: The person placing the catheter pins the vein with their non-dominant thumb just distal to the insertion point and pulls the skin taut toward the paw. A vein that cannot roll is dramatically easier to hit. This one habit converts most “near-miss” students.
- Angle: The cephalic is shallow — enter at a shallow angle appropriate for a superficial vein, not the steep angle that skewers through the back wall.
Step-by-Step: Placing the Catheter
- Prepare everything first. Perform hand hygiene, wear appropriate gloves, clip the site, and prepare the skin with an appropriate antiseptic. Use a new sterile catheter for every attempt. Pre-tear your tape, draw up a saline flush, and have the T-port or extension set within reach. Your stick is not finished until it is secured — set up to secure before you touch the needle.
- Have the vein raised. Confirm the restrainer has the vein held off and you can palpate it filling.
- Anchor and enter. Pull the skin taut, insert through skin and into the vein at a low angle until you see flashback in the catheter hub.
- Flatten and advance a hair. Lower the angle and advance the catheter-and-needle assembly slightly so the catheter tip — not just the needle tip — sits inside the lumen.
- Feed the catheter, not the needle. Holding the stylet still, thread the catheter off it and up the vein. It should advance smoothly; if resistance is encountered, do not force it.
- Occlude, withdraw stylet, connect. Press over the catheter tip to stop bleeding, remove the stylet, and attach your flushed T-port.
- Flush and secure. Check patency with a sterile saline flush using gentle pressure, stopping if you meet resistance, pain, leakage, or swelling, then tape securely in a way that does not kink the catheter.
When It Goes Wrong: Troubleshooting
- Flashback, then nothing threads: The bevel is in but the catheter tip is not — advance the unit a touch more before feeding the catheter.
- Vein “blows” (swelling on flush): You went through the back wall or the vein was not anchored. Remove the catheter, apply pressure, assess the affected vein, and select another suitable site if necessary.
- Catheter kinks or won’t advance: Often a too-steep entry or a valve. Reposition; do not force it.
- Repeated misses: Stop and reset rather than “fishing” under the skin — one redirect maximum, then withdraw. Fishing shreds the vein and the patient’s patience.
Complications to Recognise Early
Placement is only half the job — a catheter must be monitored. Check the site at least twice daily, and whenever clinically indicated, for phlebitis (heat, swelling, pain along the vein), extravasation (fluid leaking into tissue, causing puffiness), dislodgement, and infection. Most peripheral catheters should be re-sited if they show any of these signs, and a catheter should be replaced when clinically indicated or according to your hospital protocol. Catching a failing catheter early prevents a minor problem from becoming a painful one.
Can a Dog Walk or Run With an IV Catheter In Place?
This is one of the most common questions owners ask. The short answer: calm, supervised movement may be acceptable; running, jumping, licking, and rough play should be prevented. Once a peripheral catheter (typically in a foreleg) is secured and bandaged, most dogs can stand, shift position, and walk a few steps without dislodging it, because the line is taped specifically to stop movement at the insertion site.
- Avoid running and jumping. Vigorous activity can kink the catheter, blow the vein, or pull the line loose — especially if the dog is connected to a fluid bag.
- Mind the joint. A catheter near the carpus or elbow can kink when the leg bends, slowing or stopping flow; a light bandage helps keep the limb stable.
- Stop the licking. Dogs often chew at the bandage. An Elizabethan collar prevents them from pulling the catheter out.
- Hospitalised patients are cage-rested. If a dog is on continuous fluids, activity is naturally limited by the IV line; the limb is kept supported.
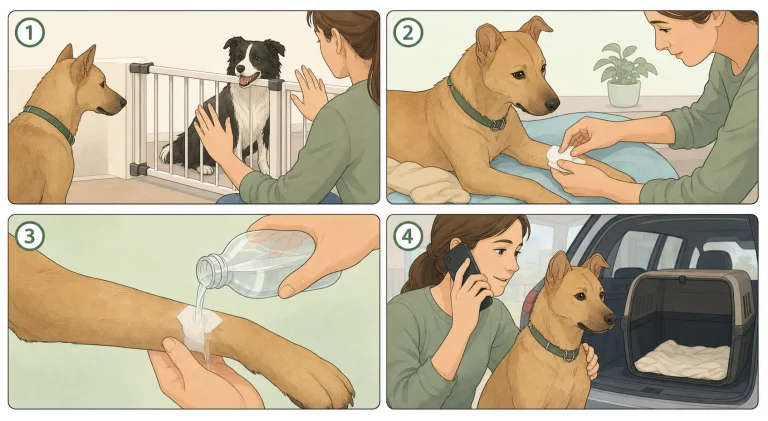
For most short procedures the catheter is removed before the dog goes home. If a catheter is kept in place, keep the dog calm, prevent running, jumping and licking, and watch the site. Contact the clinic if the leg swells, the bandage gets wet or slips, or the dog seems painful — these are signs the catheter may need attention.
Building the Skill Safely
IV catheter placement is a psychomotor skill, so learners benefit from practising vessel palpation, skin tension, low-angle entry, flashback recognition, catheter advancement, flushing, and taping in a controlled simulation before progressing to supervised work with live patients. Simulation does not reproduce every feature of a moving or clinically ill dog, but it allows the sequence to be repeated without using a patient for a learner’s first attempts.
Conclusion
Reliable canine IV catheter placement comes from a consistent sequence: select an appropriate vein, position and anchor it, enter at a controlled low angle, respond correctly to flashback, thread without forcing, confirm patency, and secure the line without a kink. A clean reset is safer than repeated blind redirection when the catheter will not advance or the site begins to swell.
Frequently Asked Questions
Why is there flashback but the catheter will not advance?
Flashback confirms that the needle tip reached blood, but the flexible catheter tip may still be outside the vessel. Keep the assembly stable, lower the angle, and use only the small controlled advance taught in your supervised protocol before attempting to thread. Do not force the catheter; resistance, lost flashback, pain, or swelling is a reason to stop and reassess.
How do you confirm that a canine IV catheter is patent?
After connecting a flushed extension or port, use a gentle flush while watching and feeling the site. A patent catheter should accept the flush without unexpected resistance, leakage, pain, or tissue swelling. Any abnormal finding requires the supervising veterinary professional to stop and reassess the catheter before it is used.
When should a veterinary student stop trying and ask for help?
Follow the clinic or teaching program’s attempt limit. Stop sooner if landmarks are uncertain, the dog cannot be safely restrained, the vein is becoming traumatised, swelling develops, or the learner begins redirecting blindly. Escalating to an experienced team member protects the patient and preserves other access sites.
References & Further Reading
- Merck Veterinary Manual (merckvetmanual.com)
- American Veterinary Medical Association (AVMA) (avma.org)
- Today’s Veterinary Nurse (todaysveterinarynurse.com)
Disclaimer: This article is for educational purposes only and is not a substitute for professional veterinary advice, diagnosis, or treatment. Always consult a licensed veterinarian regarding your animal’s health. Last updated: August 2026.
Related Canine Clinical Skills Guides
- Canine Venipuncture: Blood Collection Guide — drawing blood from the cephalic, jugular, and saphenous veins.
- Dog Injections: Subcutaneous (SC) vs Intramuscular (IM) — choosing and giving the right medication route.
- Subcutaneous Fluids for Dogs — giving hydration fluids at home, step by step.
- Difficult Canine Jugular Venipuncture — failed draws, complications, and special-patient troubleshooting.
- How to Intubate a Dog — airway preparation, tube selection, placement, and confirmation for canine anesthesia.
Veterinary Review
This article has been reviewed and corrected for clinical accuracy by Dr Ibrar Ahmed (DVM, PhD), a veterinarian with more than 10 years of experience in practice who also works as a fact-check reviewer for a range of platforms. Reviewed August 2026. Clinical review confirms accuracy at the time of publication; it does not create a veterinarian-client-patient relationship or replace the direction of the veterinarian attending your animal.
Training Resources
Two veterinary IV catheter practice kits cover this procedure. The Canine IV Training Model (MT00513) includes the canine leg model, a 100 ml fluid bag, 10 g simulated blood, and a 60 ml syringe. The Dog IV Practice Kit (MT00521) uses the same core training functions with a broader accessory set that also includes an IV drip kit, cannulas, tapes, alcohol pads, and additional fluid and syringe components. Both support practice in flashback recognition, infusion, blood draw, catheter advancement, and taping.