You have placed catheters in dogs. The first few cats feel like a different procedure, and in the ways that decide whether it works, they are.
This guide covers placing a peripheral IV catheter in a cat’s cephalic vein: what to set up, what is physically different from a dog, the insertion sequence, how to read flashback in a small catheter, how to secure it, and why attempts fail.
It does not cover choosing between veins — that is in our cat blood draw sites guide — and it does not cover restraint, which is in our low-stress cat restraint guide.
Quick Answer: Four Things to Do Differently
1. Size to the vein, not to the body weight. Select the largest catheter that sits comfortably in the vessel and suits the intended therapy. 2. Set up completely before you start. Plan around getting one good attempt per vein. 3. Wait before you decide you missed. Flashback is slow and faint in a small catheter. 4. Secure it as though the patient will remove it. It will try.
The next section explains why each of these is different from a dog. If you only change one thing, change the second.
Set Up Before You Touch the Leg
In a cat, anything you fumble for after flashback is a vein lost. Have all of it open and within reach first:
- The catheter, plus a spare of the same size and one a size smaller.
- A T-port or extension set, already flushed.
- A prefilled sterile saline flush.
- Tape cut to length in advance, not torn one-handed mid-procedure.
Prepare the site properly: hand hygiene, appropriate gloves, clip the fur, and prepare the skin with an appropriate antiseptic. Use a new sterile catheter for every attempt — a stylet that has already been through skin is blunter and will drag.
A Cat’s Cephalic Vein Is Not a Small Dog Vein
Four physical differences change what your hands do.
The vessel is small and shallow. There is very little margin between “in the lumen” and “through the back wall”. The angle that works on a dog will pass straight through a cat.
The vein rolls. Without something holding it in place, the vessel moves away from the needle rather than being punctured. The holder’s thumb rolling the vein slightly outward is not an optional refinement; it is what makes the stick possible.
Feline veins spasm. Handling, cold, and repeated attempts all cause the vessel to constrict. A vein that was visible on your first look can be difficult to find minutes later. This is the single strongest argument for being fully set up before you start.
The skin is tough relative to the vein. You may feel more resistance getting through the skin than you expect, then almost none once you are through it. That contrast is what causes over-penetration — the hand that was pushing hard through skin keeps going.
Step by Step: Placing the Catheter
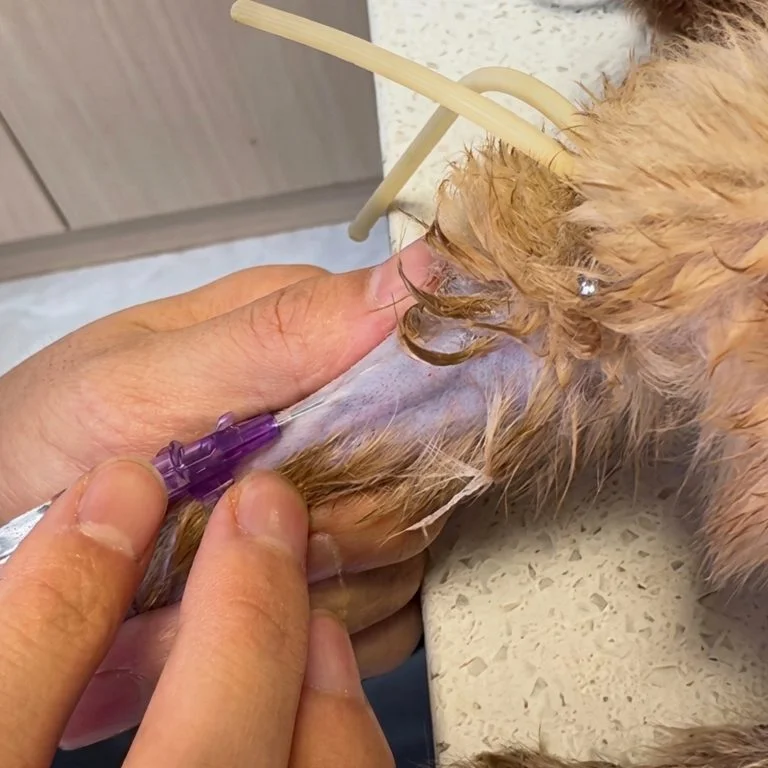
1. Position and occlude. With the cat sternal and the foreleg extended forward, the holder cups the elbow from behind and occludes with the thumb across the top of the forearm, rolling the vein slightly outward. 2. Anchor the skin. Use your free thumb to put light tension on the skin distal to your entry point. Slack skin moves with the needle instead of letting it through. 3. Enter the skin. Insert at a shallow angle, bevel up, a short distance distal to where you expect to enter the vein. 4. Advance to the vein. Move slowly and in one plane. Wide side-to-side searching under the skin damages tissue and the vessel, and it will not find a vein that has rolled. 5. Watch for flashback. Blood appears in the hub. In a small catheter this may be a slow trickle rather than an immediate flash. 6. Lower and advance slightly. Drop the angle almost flat and advance the catheter-and-needle assembly a little, so the catheter tip and not just the needle tip is inside the vessel. 7. Thread the catheter off the stylet. Hold the stylet still and feed the catheter forward. It should advance smoothly. If you meet resistance, do not force it. 8. Occlude, remove the stylet, connect. Press over the catheter tip to stop bleeding, withdraw the stylet, and attach the flushed T-port. 9. Check patency. Flush gently with sterile saline. Stop if you meet resistance, or if there is pain, leakage, or swelling. 10. Secure. Tape without constricting, and without kinking the catheter at the carpus.
Reading Flashback in a Small Catheter
This is where experience with dogs misleads people most.
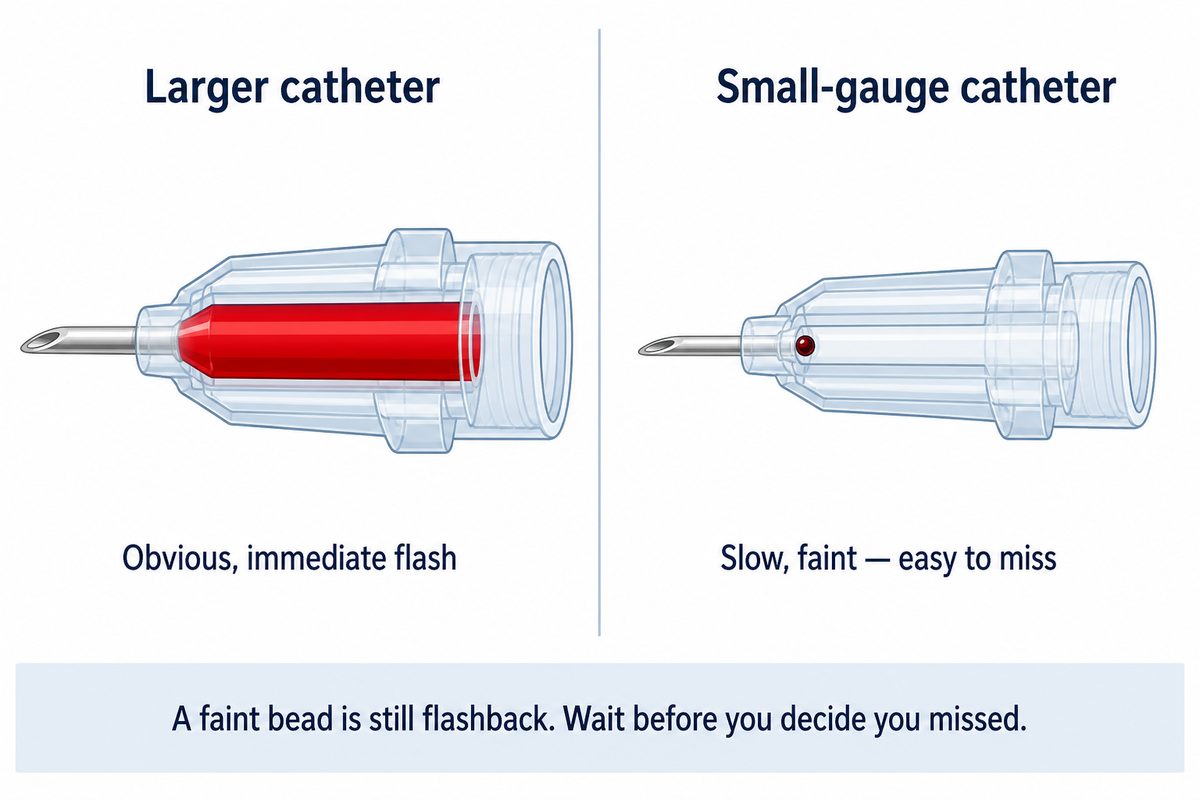
Original educational illustration. Relative bore only; no specific gauge sizes are shown, because catheter size should follow the vein and the therapy rather than a fixed rule.
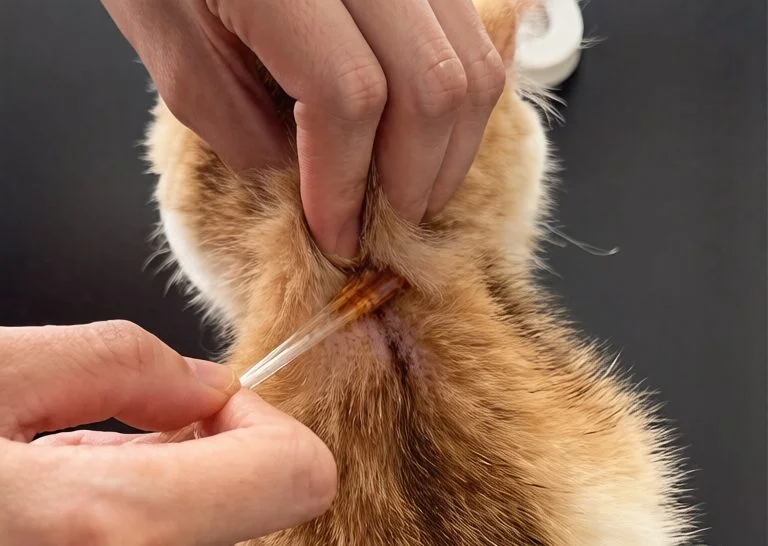
In a 24-gauge catheter the internal volume is tiny and the flow is slow, so blood may take a moment to reach the hub and may appear as a dark bead rather than a filling flash. In a hypotensive, dehydrated, or cold patient it can be slower still, or barely visible.
Two consequences follow.
Do not conclude too early that you missed. Pausing briefly before you decide is often the difference between a placed catheter and a wasted vein.
Do not treat any dark color in the hub as confirmation either. If the catheter will not thread and the flush does not run cleanly, you are not in the vessel, whatever you thought you saw.
Securing Without Constricting
A catheter that is placed and then lost to bad taping has not been placed.
Tape the hub down first so the catheter cannot back out, then secure the T-port so its weight and movement do not lever the catheter at the insertion site. Keep the wrap snug enough to stay on and loose enough to admit a finger.
Check above and below the tape for swelling before you leave the patient, and again when fluids start running. Swelling distal to a bandage is a constriction problem and needs the bandage off, not tightened.
Assume the cat will attempt removal. A catheter that survives placement but not the next twenty minutes is a catheter you will be placing again.
Why Attempts Fail in Small Feline Veins
| What you see | Most likely cause | What to do |
|---|---|---|
| Vein not visible or palpable | Spasm, cold patient, poor occlusion, thick coat | Reassess occlusion and position before sticking; do not stab hopefully |
| Vein moves away from the needle | Not rolled or anchored | Release, re-occlude, roll the vessel outward, tension the skin |
| No flashback | Wrong depth or plane, or vessel missed | Withdraw slightly along the same track; do not fan sideways |
| Flashback, then nothing | Only the needle tip is in the lumen | Lower the angle and advance the assembly slightly before threading |
| Catheter will not thread | Vein wall, valve, spasm, or a bent catheter | Stop. Do not force. Remove and reassess |
| Swelling as you flush | Catheter is not in the vessel | Stop, remove, apply pressure, choose another site if needed |
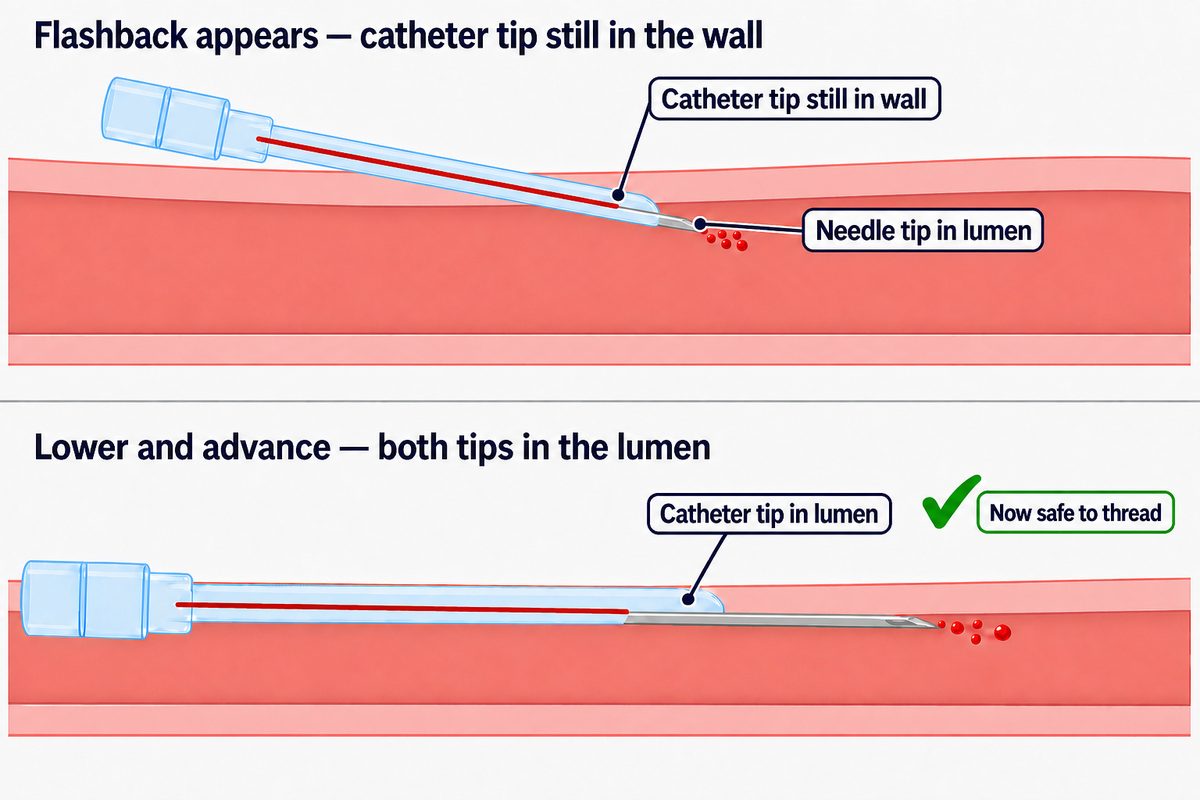
Original educational illustration of the most common failure after flashback. The needle crosses the near wall only; lowering the angle and advancing slightly brings the catheter tip into the lumen.
The common error behind most of these is force. A feline vein does not reward pushing harder.
When to Stop
Decide your attempt limit before you begin. Each failed attempt makes the next one harder on the same limb, because of bruising and spasm.
Protect the second cephalic. Using up both forelimbs on a patient who then needs reliable access is worse than handing over earlier. If two attempts have failed, the next attempt should usually be made by someone more experienced rather than by the same hands trying again.
Escalating patient distress is a reason to stop, not a reason to hurry. A cat that is decompensating needs the attending veterinarian, not another attempt.
Conclusion
Cephalic catheterization in cats is the same sequence as in dogs performed with less margin for error. Smaller gauge, flatter angle, a vein that has to be held still, flashback you have to wait for, and taping that has to survive the patient.
Set up completely before you start, treat the first attempt as the one that matters, and stop before the limb is used up. Most feline catheter failures are preparation and patience problems, not hand-skill problems.
Frequently Asked Questions
What size IV catheter is used in a cat?
Cats generally take a smaller gauge than dogs, but the size should follow the vein and the therapy rather than a fixed rule based on body weight. Select the largest catheter that sits comfortably in the vessel and suits what you need to deliver through it. Where rapid fluid delivery is the goal, a shorter, larger-bore catheter moves fluid faster than a long narrow one.
Why can I get flashback but not advance the catheter in a cat?
Most often only the needle tip has entered the lumen while the catheter tip is still in the vessel wall. Lowering the angle and advancing the whole assembly slightly before threading usually resolves it. Other causes are a valve, vessel spasm, or a catheter that has been bent on a previous attempt. In all cases the response is the same: do not force it.
How long can a peripheral IV catheter stay in a cat?
There is no single figure that applies everywhere. Replace a catheter when it is clinically indicated or according to your hospital’s protocol, and check the site at least twice daily and whenever anything about it changes. Signs that a catheter needs to come out include swelling, pain, leakage, discharge, heat, or a line that no longer flushes cleanly.
Sources
- Merck Veterinary Manual — Collection and Submission of Laboratory Samples from Animals (merckvetmanual.com)
- Today’s Veterinary Nurse — Uncommon IV Catheter Sites in Small Animals (todaysveterinarynurse.com)
- American Association of Feline Practitioners / International Society of Feline Medicine — 2022 Cat Friendly Veterinary Interaction Guidelines (catvets.com)
Disclaimer: This article is for professional education only and is not a substitute for veterinary advice, diagnosis, or treatment. Catheter selection, placement, and maintenance decisions for an individual patient must follow your practice’s protocols and the direction of the attending veterinarian. Last updated: September 2026.
Training Resources
The steps above are a hand sequence, and hand sequences are learned by repetition rather than by reading. Rehearsing them away from a patient is what allows the first attempt on a real cat to be the one that counts.
The Veterinary Cat IV Practice Kit is a feline peripheral-vein leg model for practicing vein puncture, blood draw with realistic flashback, IV catheter placement, and fluid-infusion setup. It represents a limb vein, so it supports peripheral catheter practice only; it is not a jugular model and does not simulate central access.
For the canine equivalent of this procedure, see our step-by-step guide to canine IV catheterization.
If dogs are your baseline, Cat vs Dog Venipuncture: What Actually Changes sets out which defaults to reset and which carry across unchanged.